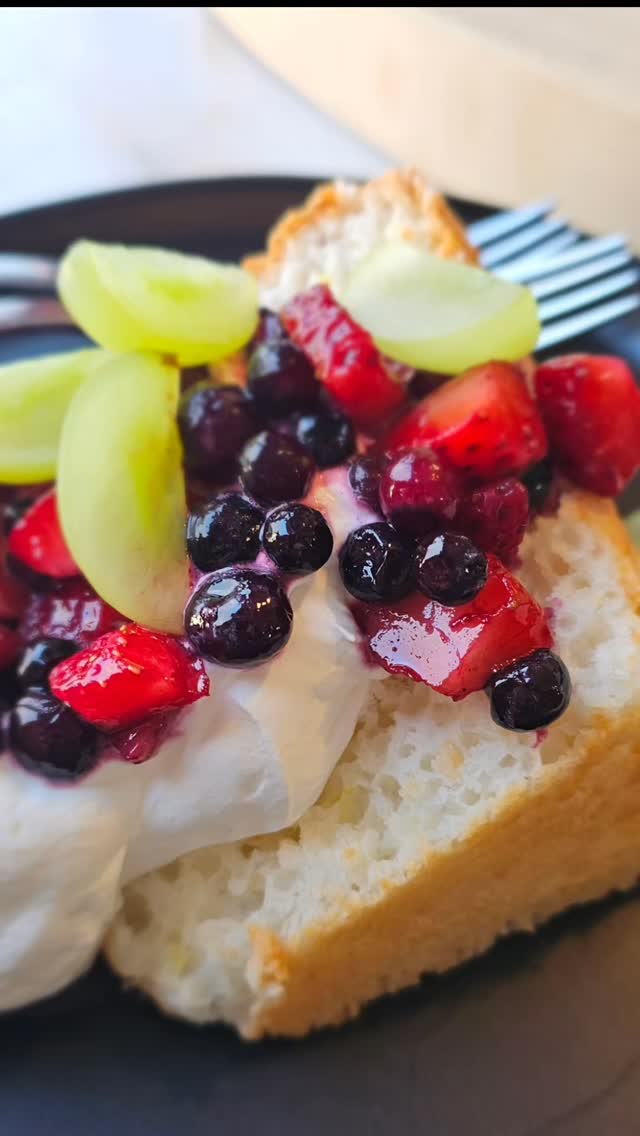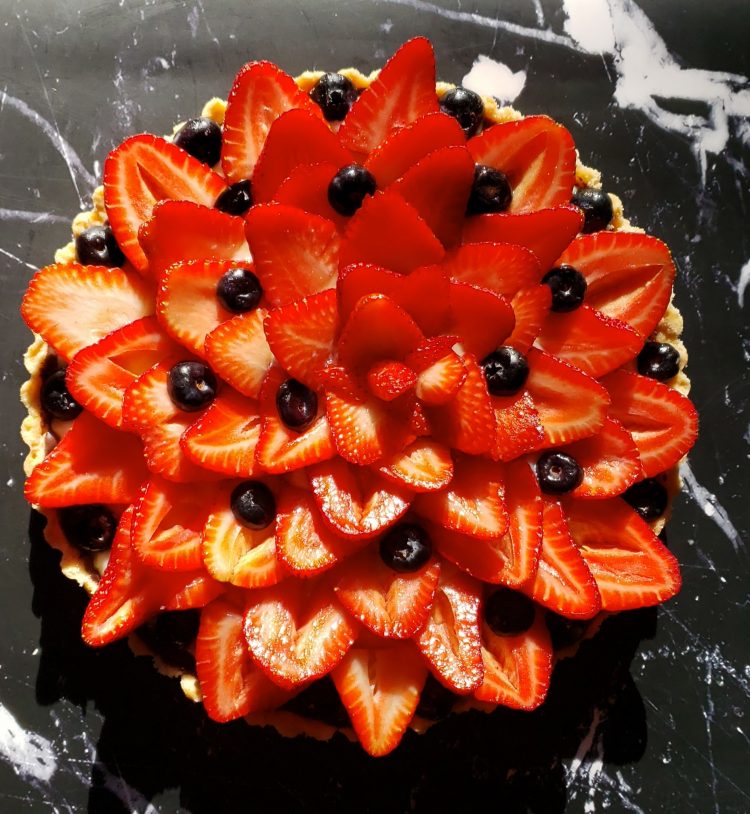
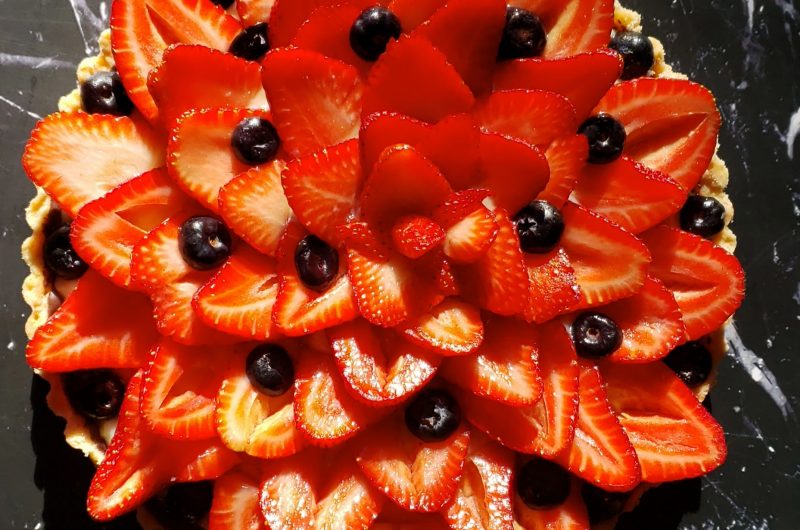
Nothing says summer like this Beautiful 3 Step Seasonal Fresh Fruit Tart finished with your favorite seasonal fruits. They are elegantly simple, beautiful, balanced and delicious. A good crust delivers a crisp texture with just a hint of salt to help bring out the natural flavors of the filling. The custard is delicate, but substantial enough to carry the weight of summer’s sweet fruit. Tarts make a big impact, but they are also very easy to make.
If you’re ready to jump in with this recipe, but are still wondering where to get your hands on mini tart shell molds, most kitchen retail stores offer a few to choose from. However, Country Kitchen SweetArt offers a wide assortment of tart shell mold sizes and shapes if you’re looking for a very specific shape or design.
Whatever shape you choose, these Beautiful 3 Step Seasonal Fresh Fruit Tarts are always delicious and elegant.
Jump to RecipeTable of Contents
Recipes that work for you
I believe in recipes that can multi-task. This Beautiful 3 Step Seasonal Fresh Fruit Tart recipe utilizes two of my favorites – both for the flexibility and flavor. In this recipe, I use the same Coconut Shortbread Crust that serves as the base in my recipe for Lita’s Lemon Bars. On average, one recipe for the coconut shortbread will yield two 9-inch round or square tart shells; one 9-inch tart shell and 18 mini tart shells, or 36 individual mini tart shells.
Whenever I make a Beautiful 3 Step Seasonal Fresh Fruit Tart for company, I will often make a large tart shell for my guests, and a few other shapes – either large or small for future use. Stored in a solid, airtight container in the freezer, baked shells can last for up to three months, making them a great go-to for a quick dessert.
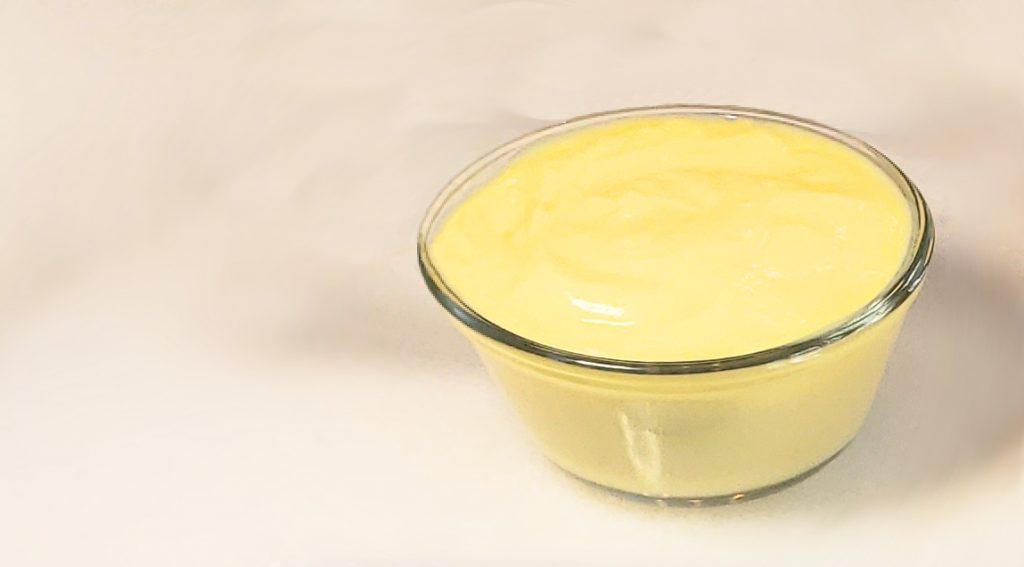
I also use my recipe for Classic Vanilla Pastry Cream as the tart shell filling. This is a very versatile filling for doughnuts, cakes and pies.
Working ahead equals less stress when making this Beautiful 3 Step Seasonal Fresh Fruit Tart
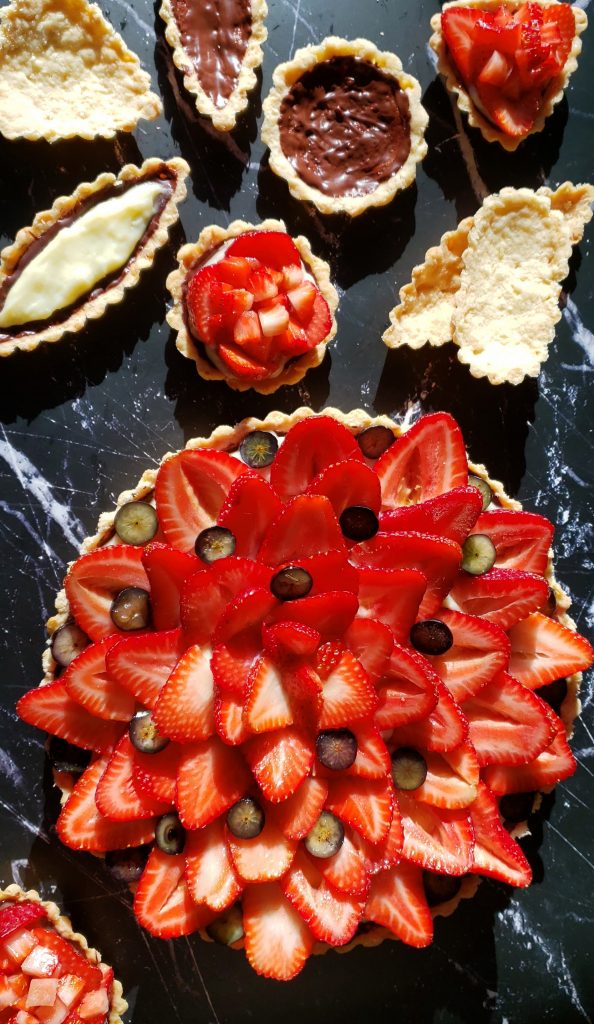
I also believe in recipes that can be broken down into manageable steps over the course of a few days. And this recipe for Beautiful 3 Step Seasonal Fresh Fruit Tart can be broken down into three easy steps easily. I hear from a lot of people that they sometimes shy away from a recipe because they are short on time during the week. This is an easy, fast recipe if you break it up into manageable steps – with each step taking no more than 20 minutes on average. For example, if I’m preparing a tart for a gathering, I typically make the shells 3 days ahead and the pastry cream 2 days ahead. The day before or the morning of the event, I’ll glaze the bottom of the shells with chocolate. I’ll then fill them with pastry cream, and top them with my favorite fruit in season.
When you look at a recipe, figure out what you can do today, what you can do tomorrow and what you must do the day you plan to serve your dish. If you’re entertaining and looking for a dessert to end the meal on a high note but you’re on a tight schedule, look for a recipe that will allow you to work ahead and stress less. There’s no rule that says you have to do it all in one fell swoop.
How do you keep fruit tarts from getting soggy?
This recipe for Beautiful 3 Step Seasonal Fresh Fruit Tart is an easy, fast recipe if you break it up in steps – with each step taking no more than 20 minutes on average. If I’m preparing a tart for a gathering, I typically make the shells three days ahead and the pastry cream no more than two days ahead.
So, how do you keep fruit tarts from getting soggy? The day before or the day of the event, I will glaze the bottom of the shells with melted chocolate. After the chocolate has cooled and hardened, I then fill them with custard before topping them with fruit and brushing them with agave nectar. The layer of melted chocolate provides a protective moisture barrier between the crust and the pastry cream. It also provides a little extra structural support to the tart shell.
Beautiful 3 Step Seasonal Fresh Fruit Tart
Course: DessertDifficulty: Intermediate8
servings1
hour40
minutesElegantly simple, beautiful, balanced and delicious.
Ingredients
One batch of Classic Vanilla Pastry Cream
One batch of Coconut Shortbread Crust from Lita’s Lemon Bars recipe
Assorted fresh fruit
Agave nectar for glazing the fruit
1/4 cup chocolate chips, melted for lining the tart shells (optional)
One 9″ tart shell or as many individual tart shells as desired.
Directions
- Pastry Cream Directions
- Prepare the pastry cream as directed. Cool completely and store in the refrigerator until ready to assemble the tarts.
- Coconut Shortbread Shells Directions
- Preheat over to 350 degrees F.
- Prepare the coconut shortbread crust as directed.
If making individual tarts, press the dough into the shells and bake for approximately 15 minutes or until lightly browned. Allow to cool completely before attempting to remove them from the shells.
If preparing a large tart shell, line the bottom of the pan with a circle of parchment paper that has been cut to size. Baking time will be 20 – 25 minutes or until lightly browned. - Once completely cooled, gently remove the shortbread shells from their tins.
- Melt the chocolate chips in the microwave for 30 seconds. Stir and repeat the process until the chocolate is completely melted. Spread with a small pastry brush over the base and sides of the tart shells. The tip of your index finger works nicely as well.
- Assemble the Tarts
- Fill the prepared shells with pastry cream, leaving approximately 1/8 inch of space from the the top of the shell. Top with fruit and lightly glaze with agave nectar to keep the fruit from drying out.
- Store assembled tarts in the refrigerator in an airtight container. Serve within 24 hours of assembly.
Notes
- How many shells can I get out of one recipe of the coconut short bread? On average, one recipe for the coconut shortbread will yield two 9″ round or square tart shells; one 9″ tart shell and 18 mini tart shells, or 36 individual mini tart shells.
- What can I do if I don’t need that many shells? Make what you need and freeze the unused dough for another day. You can also bake the additional shells, pack them in a hard-sided container and freeze for future use. I will often have a set of shells stored in the freezer that I can draw from when I need a quick, elegant dessert.
- How far in advance can I make this recipe? This is an easy, fast recipe if you break it up in steps – with each step taking no more than 20 minutes on average. If I’m preparing a tart for a gathering, I typically make the shells 3 days ahead and the pastry cream 2 days ahead. The day before or the day of the event, I will glaze the bottom of the shells with chocolate. I’ll then fill them with custard before topping them with fruit and brushing them with agave nectar.
- Why glaze the bottom of the shell with chocolate? Glazing the bottom of the shell with chocolate allows you to work ahead. It also protects the integrity of the shell. The chocolate will create a moisture barrier that will prevent the shell from becoming soggy.