

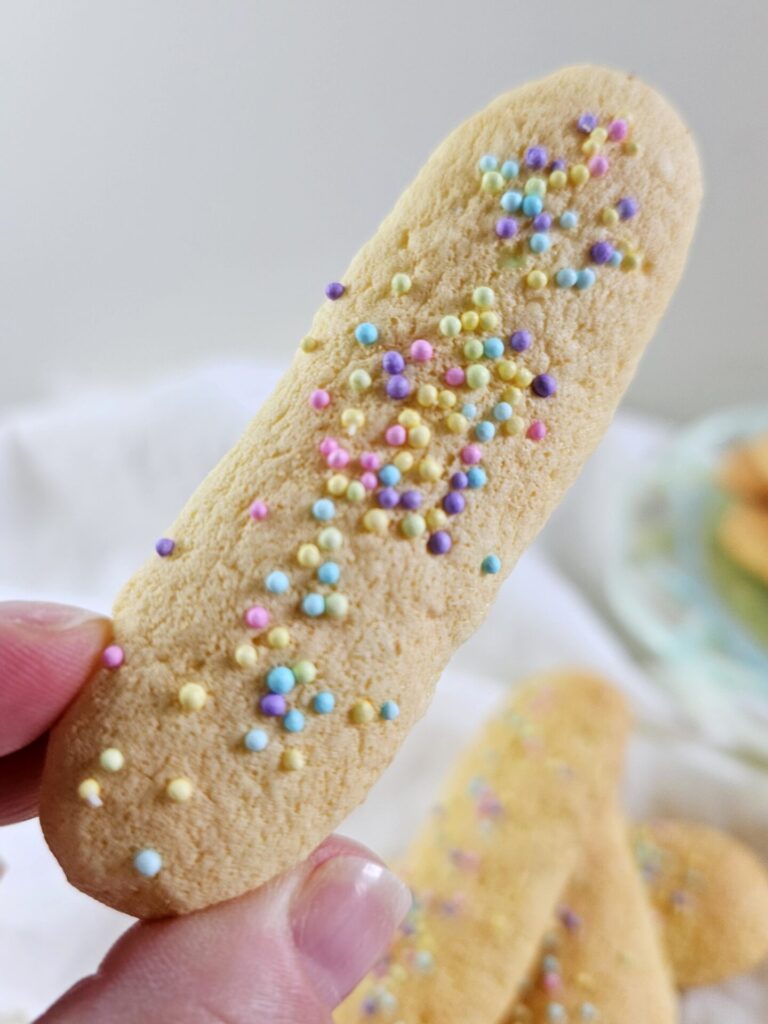
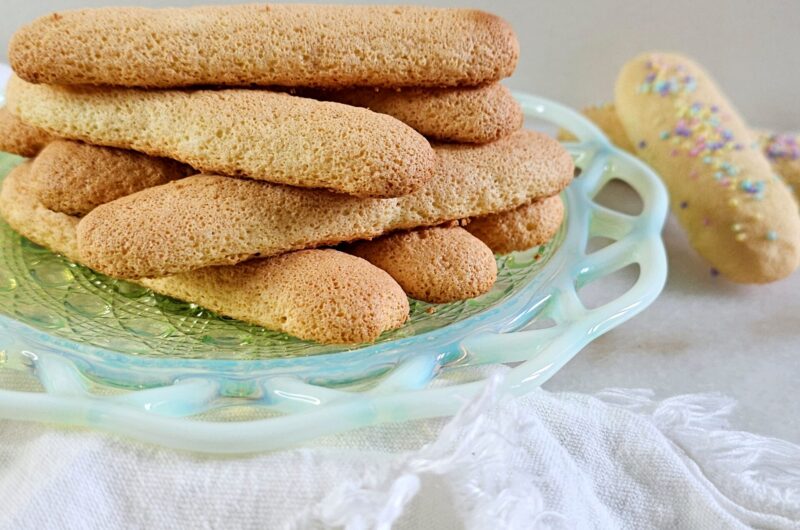
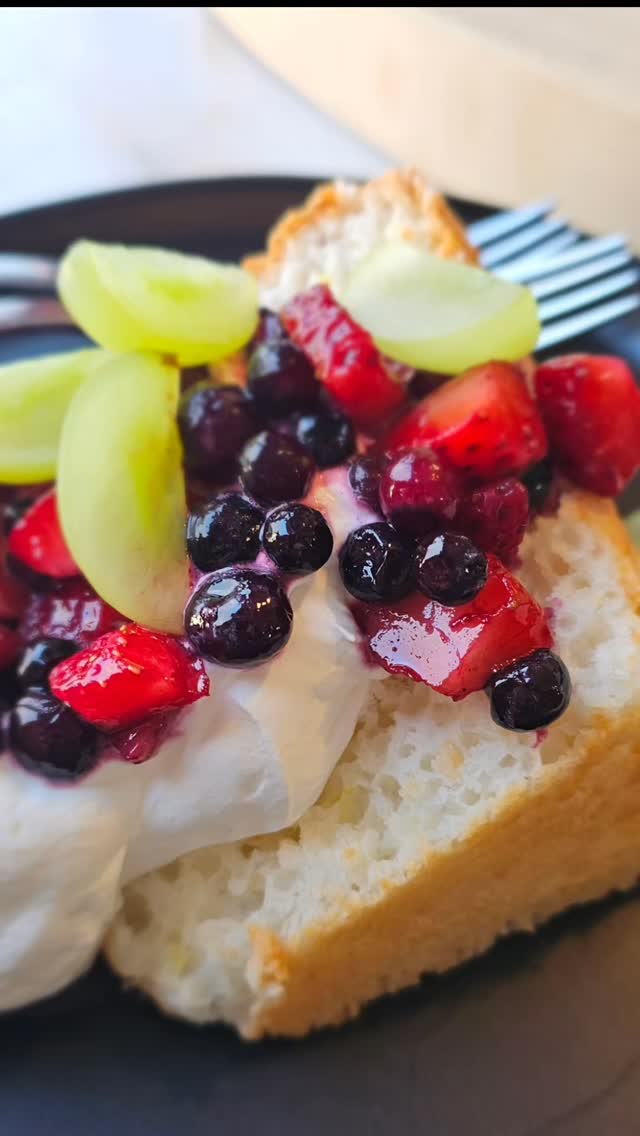
Is it really possible to make the Best Homemade Italian Lady Fingers in 1 Hour? Yes! Learn how to make these delicious biscuits. They’re perfect as the base for elegant finger pastries and desserts, including Tiramisu, but I love them best with a cup of tea. Simply dressed or fancied up, this cookie is truly perfect for any occasion.
The steps in this recipe are simple and the ingredients are few. Once you’ve mastered the steps, the flavor combinations are practically limitless – vanilla, almond, lemon, anise, lavender, orange, or some other favorite combination. So jump ahead to the recipe, gather your ingredients, then read on to learn how to make this delicious and versatile Lady Fingers recipe.
Jump to RecipeTable of Contents
You Say Savoiardi. I Say Lady Fingers.
Depending on where you grew up, you knew these lovely, sponge cookies by either name. If you have Italian roots or live near a good Italian bakery, you likely know these delectable biscuits as Savoiardi. You may have seen them before in your local specialty foods store as well.
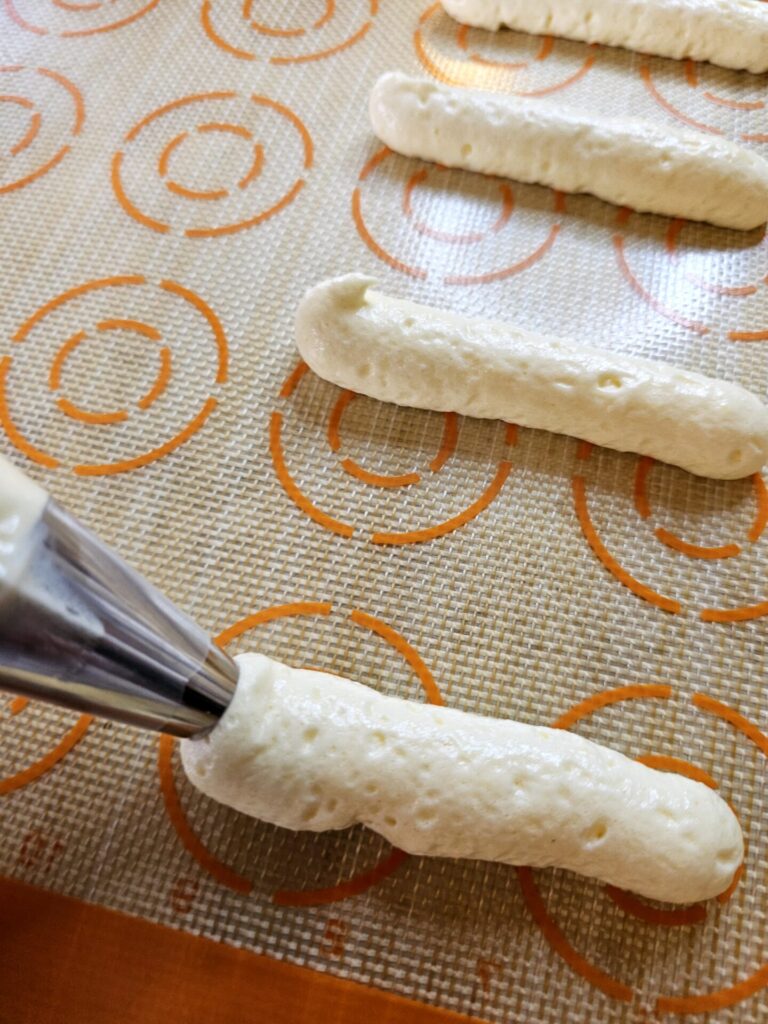
Lady Fingers get their name from their unique shape. When this sponge batter is piped into a tube shape that resembles a finger in length and width. Perhaps not anatomically exact, but if you can use your imagination to connect the dots in the night’s sky to see hunters and crabs and other figures in the constellations, you likely have the creative ability to see a finger in the piped shape of this cookie.
The texture of this biscuit can vary from soft and spongy to light and dry. In this recipe, you can adjust the baking time slightly to get the perfect texture for your intended use. For example, if you plan to use lady fingers for Tiramisu or another layered dessert that calls for soaking the biscuits in a liquid, a drier texture is preferred. However, if you’re piping chocolate ganache between two layers to create a delicate tea cookie, a softer bake may be more desirable.
For this recipe, I found 7 minutes yielded a softer cookie, and 8 minutes delivered a drier cookie, without risking burning. Of course, each oven is different, with some running a little hotter or cooler than others. I recommend checking at the 6 minute mark and adjusting from there if needed.
Building Volume with Eggs is Key to Makes These the Best Homemade Italian Lady Fingers in 1 Hour
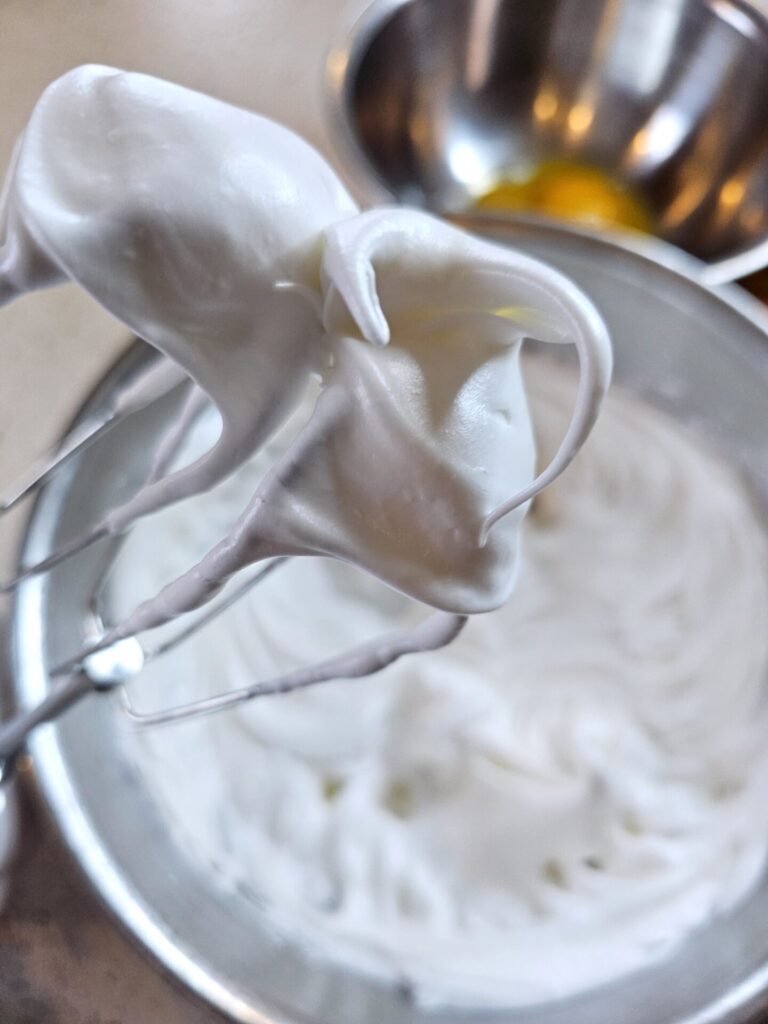
Eggs are amazing leavening agents, and they are the primary ingredient that gives this easy lady fingers recipe their light, airy texture. They are a crucial component to the success of this recipe. Follow these tips and you’ll make perfect Savoiardi biscuits every time.
Allow Eggs to Come to Room Temperature
Allowing eggs to come to room temperature before whipping helps them reach their full volume potential. Cold eggs are denser and less elastic, hindering the incorporation of air into the mixture. Whether it’s a cake, meringue, or any other whipped egg-based dish, room temperature eggs whip up more easily, resulting in greater volume and stability in the final product. Always let your eggs come to room temperature first.
Depending on how cool you keep your refrigerator, the ambient temperature of the room and the size of the egg, on average, it typically takes about 20 minutes for an egg to come to room temperature. However, if you’re in a hurry, fill a bowl with lukewarm tap water – not hot and definitely not boiling – just lukewarm water straight from the tap. Place the egg in the warm water and 5 minutes later, you’ll have “room temperature” eggs.
No Yolks in the Whites Please
When separating your eggs for this recipe, be careful not to get any yolk in the whites. The smallest amount of yolk can inhibit the egg whites from whipping up properly. The fat in the yolk can interfere with the ability of the proteins in the egg whites to form stable air bubbles, preventing them from reaching their full volume and stability when whipped. Ensuring that the egg whites are completely free from yolk helps achieve optimal results when making meringues, soufflés, or other recipes that rely on whipped egg whites for structure and texture. Always use care when separating yolks from whites.
A Little Lemon Juice Never Hurt Anybody
Whenever I need to whip egg whites for a recipe, I always use a little lemon juice to clean the bowl and the beaters before whipping. This important, but often overlooked step helps remove any traces of grease or residue that could interfere with the whipping process. Even small amounts of fat or oil can inhibit the egg whites from reaching their full volume when whipped. Lemon juice acts as a natural degreaser due to its acidic properties, effectively breaking down any remaining oils on the surfaces of the bowl and beaters.
I also call for adding a little lemon juice directly into the egg white mixture as well. The added lemon juice helps stabilize the foam and promote a greater volume. The acid in the lemon juice lowers the pH of the egg whites, which strengthens the protein structure and prevents over-aggregation of the proteins. This results in a more stable foam that can hold air bubbles for longer periods, leading to increased volume and a finer texture in the final product, whether it’s a meringue, soufflé, or other whipped egg white-based dish.
When you need your egg whites to hold their volume and structure, lemon juice is your baking bestie.
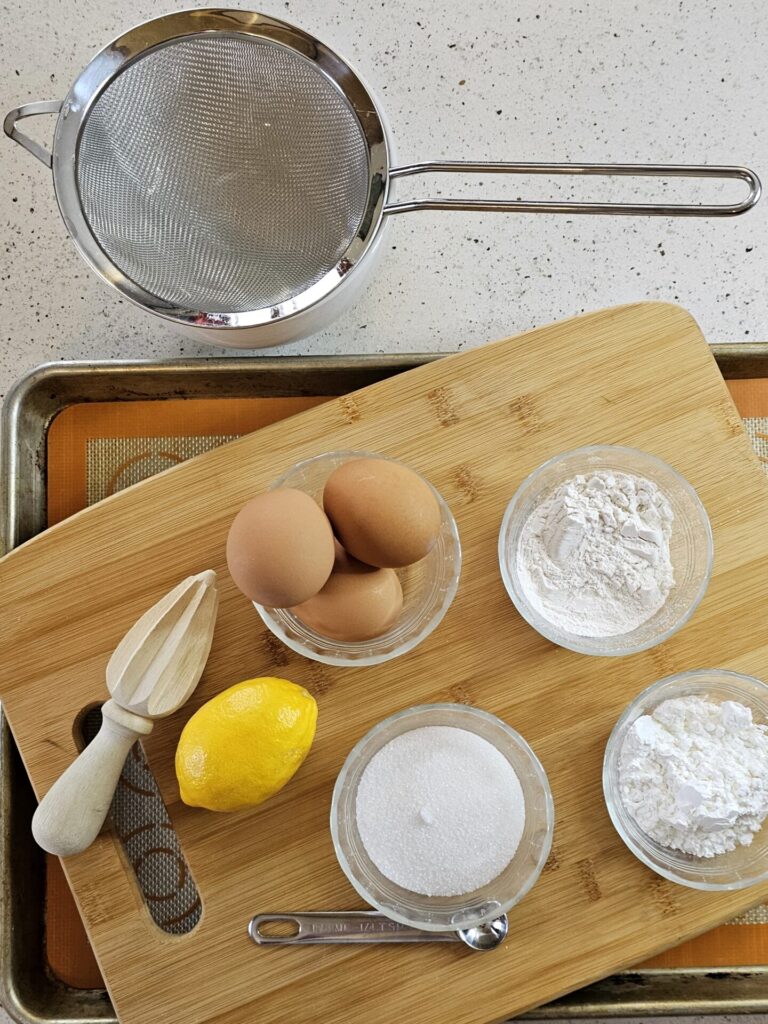
Bread Flour and Corn Starch for the Win
You may be wondering, why bread flour instead of All Purpose in this recipe, and what’s the deal with the Corn Starch?
I chose bread flour instead of all-purpose flour for this Lady Fingers recipe because it provides several benefits. Firstly, bread flour contains more protein compared to all-purpose flour, which contributes to the development of gluten. This higher protein content results in a slightly chewier texture and better structural integrity.
Using bread flour gives these lovely biscuits a finer crumb and a more tender texture, leading to a lighter and airier biscuit that still maintains its shape well. Additionally, the increased gluten formation in bread flour allows the biscuits to rise more during baking, resulting in a slightly taller and more visually appealing final product. Finally, bread flour can absorb more liquid than A.P. flour. This helps maintain the desired consistency of the batter while still achieving a light and fluffy texture.
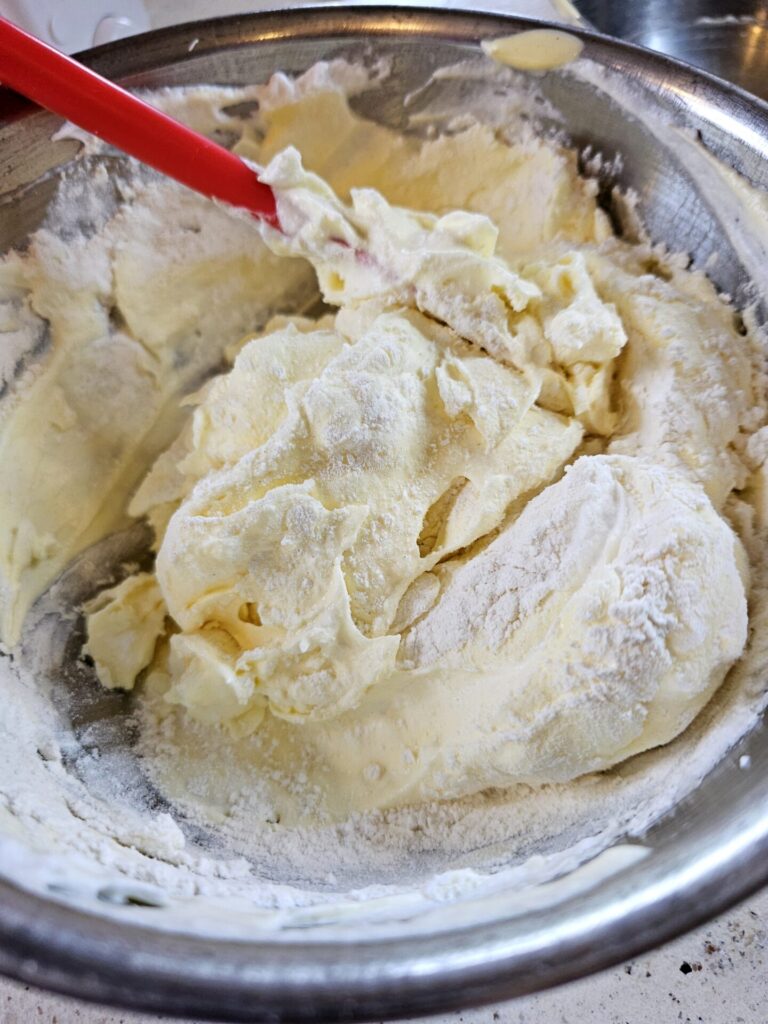
Cornstarch serves multiple purposes is this Lady Fingers recipe, as well. It contributes to the desired light and airy texture of the biscuits. It compliments the work of the bread flour in terms of delivering a tender crumb. Additionally, cornstarch helps absorb moisture from the batter without making it too dense. This, too, helps maintain the delicate texture of the biscuit. It also acts as a binding agent, helping to hold the ingredients together and preventing the biscuits from crumbling. Lastly, cornstarch contributes to the viscosity of the batter, ensuring that it is easy to pipe or shape into the desired form before baking.
Overall, cornstarch plays a vital role in achieving the desired texture, structure, and consistency of ladyfinger biscuits, contributing to their light and delicate nature. Don’t be tempted to skip it. It’s a major player in making this recipe the Best Homemade Italian Lady Fingers in 1 Hour a real keeper.
Only Bake One Sheet at a Time
Some recipes can be baked on multiple levels in the oven. This is not one of those recipes. For best results, only bake one tray at a time on the center rack of the oven. This will ensure air is able to sufficiently circulate around the cookies, giving an all-around, even bake. Only bake one tray at a time.
Other Recipes That Call for Sponge as the Base
I think every baker should have a good sponge recipe or two in their kitchen quiver. If you like this recipe for Best Homemade Italian Lady Fingers in 1 Hour, you may also appreciate this recipe for Tempting 4-Element Trifle with Fresh Fruit, Mascarpone Whipped Cream and 10 Minute Pastry Cream. It’s a true showstopper! It’s also delicious.
Layers of delicate vanilla sponge are brushed with a light mandarin orange syrup. The cubed sponge alternates between layers of vanilla pastry cream, fresh fruit and a Marcarpone whipped cream. This trifle recipe is less fussy than a cake and can be made a day ahead.
Best Homemade Italian Lady Fingers in 1 Hour
Course: DessertCuisine: Italian-AmericanDifficulty: Intermediate16
servings30
minutes7
minutesThis recipe yields 32 sponge cookies. Two cookies equal one serving.
Ingredients
1/3 cup bread flour
4 Tbsp. corn starch
3 eggs, room temperature and separated
1/3 cup plus 1 Tbsp. granulated sugar, divided
1/8 tsp. lemon juice, plus extra for cleaning the mixing bowl and beaters
Directions
- Preheat oven to 425 degrees F. Line a baking sheet with parchment paper or a nonstick Silpat mat. Set aside.
- Prepare a piping bag with a No. 5 (10-mm) plain piping tip. Set aside.
- Sift together the bread flour and corn starch. Set aside.
- Clean a medium-size bowl and beaters with lemon juice. Set aside.
- Divide the egg yolks and whites. Place the whites in the bowl that was cleaned with the lemon juice.
- Begin whipping the egg whites on medium low until frothy. Add the lemon juice. Gradually add 1/2 of the sugar. Increase speed to high and whip to firm peaks and whites have quadrupled in volume. Approximately 4 minutes. Set aside.
- In the other bowl, whip the egg yolks on medium high speed. Gradually add the remaining sugar and increase the speed of the mixer to high. Beat for approximately 2 minutes or until yolks become light and creamy and have quadrupled in volume.
- Gently fold 1/3 of the egg white mixture into the egg yolk mixture. It’s OK if there are pockets off egg white at this stage. They will get incorporated with each additional fold. Repeat this process two more times.
- Gently fold in the sifted flour and corn starch mixture until just incorporated. Be careful not to over mix. You don’t want to lose volume.
- Gently spoon the batter into the prepared piping bag. Pipe cookies, 3 inches long, onto prepared sheet pans.
- Bake at 425 degrees F. for approximately 7 minutes or until golden brown. Lady Fingers will keep for weeks if stored in an airtight container.
Notes
- Can I use bottled lemon juice to clean my utensils and in this recipe? Yes. Fresh tastes better, but in a pinch, you can use bottled lemon juice.
- Why did my Lady Fingers come out flat? There’s a couple possibilities. When separating the eggs, a little yolk in the whites can keep them from whipping properly. More often then not, flat cookies come from over mixing or aggressive folding. Be gentle when folding the whites into the yolks and the flour mixture into the egg mixture. And always sift your flour and corn starch together.


I love this recipe thank you!!!! I was looking to see if anyone used bread flour for lady fingers as I’m trying to make tiramisu but don’t have normal flour in the house. I ended up with 26 lady fingers because I don’t think I portioned the batter that well but it’s a great amount and so easy! I added vanilla extract to mine because that was recommended in the tiramisu recipe.
Hi Ava! Thank you for visiting the blog and for your kind words! I am so happy to hear that you are enjoying this recipe and making it your own. Happy baking and blessings! Maria