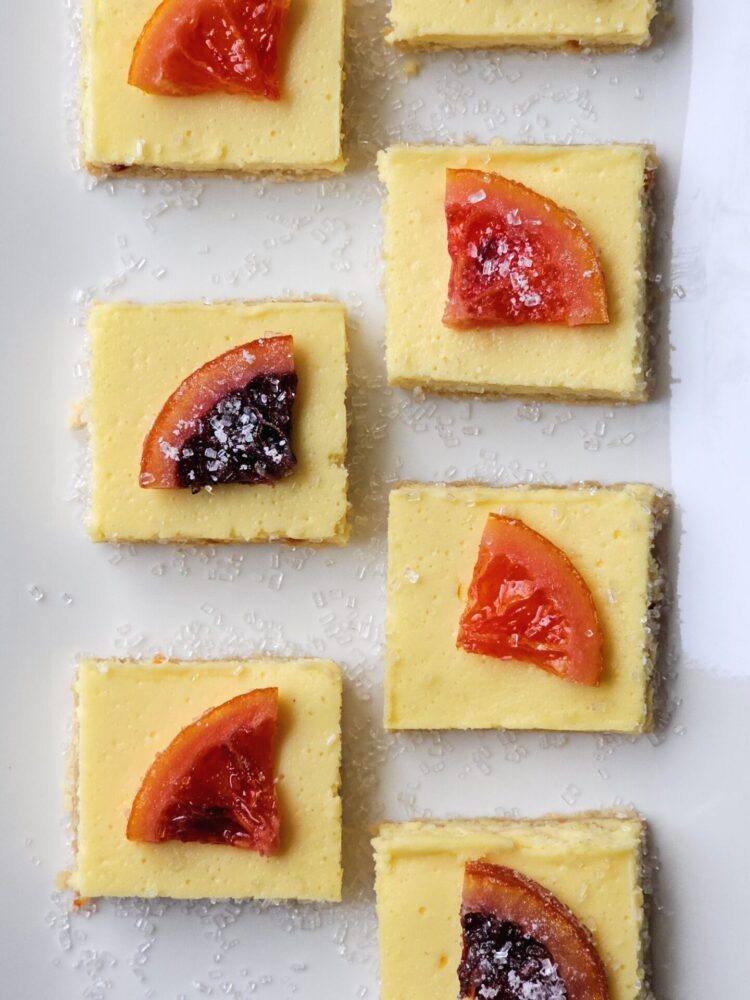
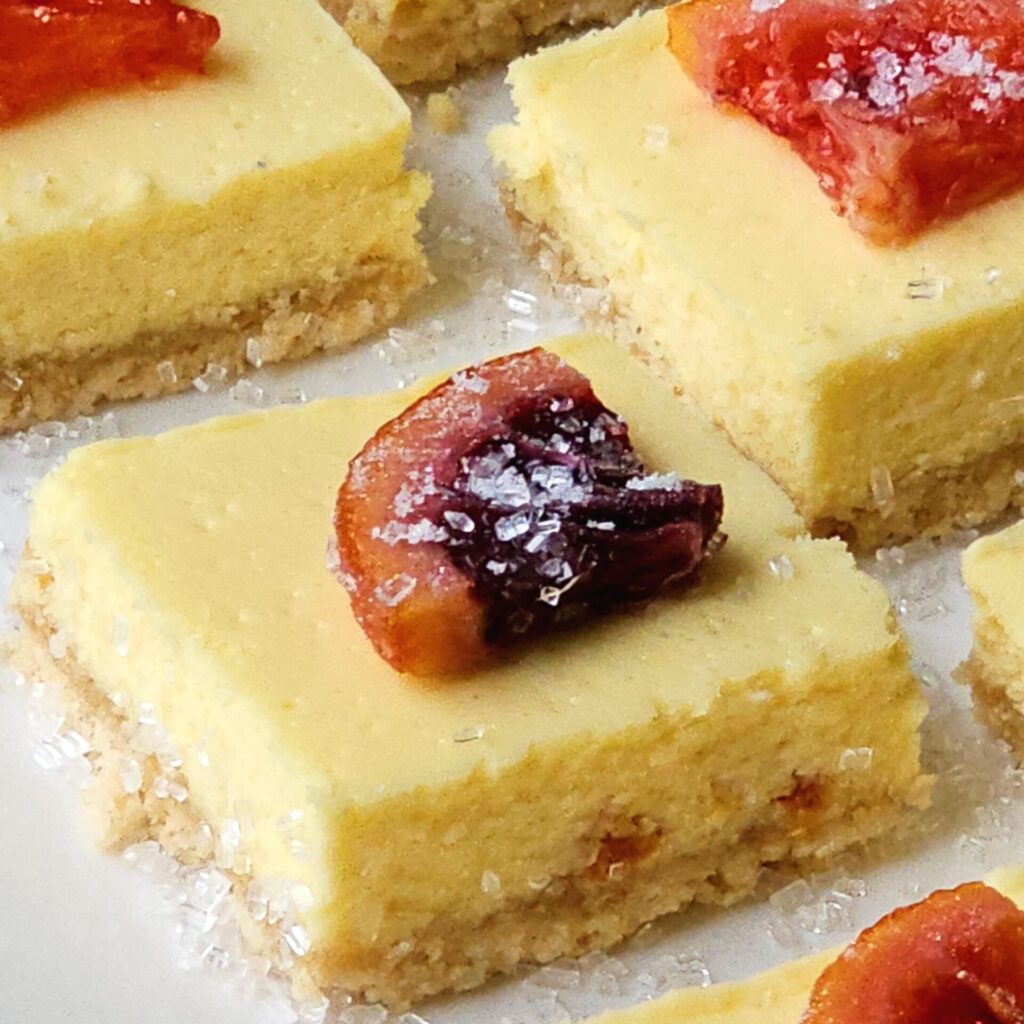
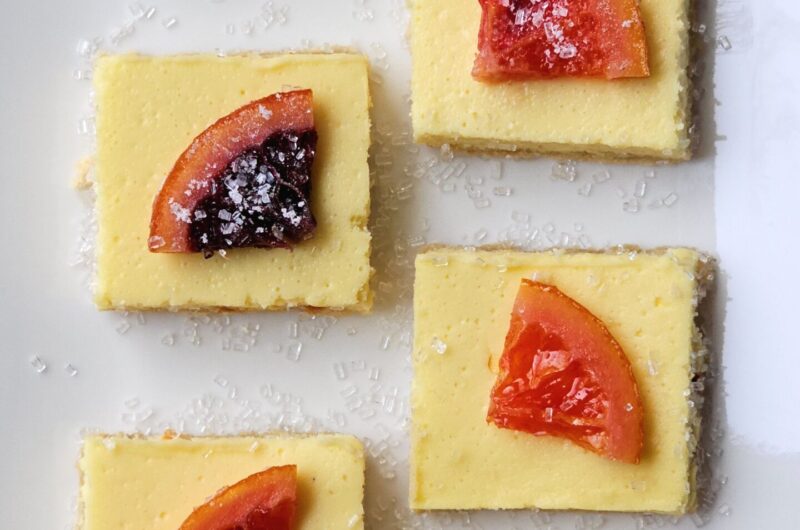
These Irresistible 3-Layer Candied Blood Orange Cheesecake Squares are as stunning as they are delicious! A creamy vanilla cheesecake layer is supported by my special crumb base and topped with a lovely slice of candied blood orange.
As far as blood orange dessert recipes are concerned, this is the kind of dessert that looks fancy enough for a dinner party but is simple enough to whip up for a casual weekend treat – especially if you make the candied blood orange in advance. So, grab your apron and get ready to wow your taste buds (and your family and friends) with these vibrant citrus squares.
Jump to RecipeTable of Contents
Irresistible 3-Layer Candied Blood Orange Cheesecake Squares – The Sum of its Parts
This dessert is about balance. It combines the rich creaminess of my vanilla cheesecake recipe with the bright, tangy sweetness of candied blood oranges. The crust is made from sugar wafer cookies. They can be quite sweet, but their sweetness is cut by the cheesecake and the candied blood orange. In turn, the flavors of the crust and cheesecake are enhanced by the candied citrus.
The sugars in the crust caramelize during the baking process to provide a good, sturdy crust, which is paramount for any cheesecake. Another up-side to this crust is that it doesn’t need to be prebaked like other cheesecake crusts. All in all, it makes for a faster, easier and tastier crust.
However, the start of the show with these Candied Blood Orange Cheesecake Squares is definitely the candied blood orange itself.
What Are Blood Oranges and What Makes Them Unique?
Blood oranges are a type of citrus fruit that stands out for their vibrant, jewel-toned flesh, which can range from deep crimson to a dark ruby red. This striking color isn’t just for show—it’s the result of anthocyanins, a type of antioxidant pigment that develops in response to cooler temperatures during the growing season. While most oranges are known for their bright orange hue, the dramatic appearance of blood oranges makes them a showstopper in both sweet and savory recipes.
So, how do blood oranges differ from their more familiar counterparts? Beyond their color, blood oranges offer a flavor experience all their own. Their taste is a delightful balance of sweet and tart, with subtle berry-like notes that set them apart from the more straightforward citrus tang of regular oranges. Some people describe the flavor as a mix of orange and raspberry or even orange and pomegranate. This unique profile makes blood oranges incredibly versatile—they can add brightness to salads, complexity to cocktails, and, of course, a bold punch of flavor to desserts like these cheesecake squares.
Another reason blood oranges are so special is their seasonality. These gems are typically in season from December to April, making them a highly anticipated treat during the cooler months. Their limited availability adds to their appeal, making them a prized ingredient for home cooks and professional chefs alike. Whether you’re using them for their vibrant juice, fragrant zest, or beautiful slices for garnish, blood oranges bring a burst of color and flavor to any dish.
Making the Candied Blood Orange
This recipe includes a step for making candied blood orange. Making candied citrus or peel isn’t difficult at all, but it does require a little time and patience, which is why I will often make a batch and store it in my pantry for times when I want to make a quick dessert. I don’t always have the time or the ingredients on hand to whip up a batch of candied citrus peel. Essentially, this is where a little forward-thinking and frugality come into play.
For example, if I’m peeling an orange to eat, I will prep the rind according to my recipe for candied citrus peel. I’ll then wrap it in plastic and store it in an airtight container in the freezer. I’ll do this over the course of a couple days or weeks until I have enough citrus to make candied peel. Once I have the candied peel prepared and readily available, I can pull it out when I want to whip up a batch of bread or another recipe that calls for candied citrus.
But I digress…

How to Prepare the Candied Blood Oranges
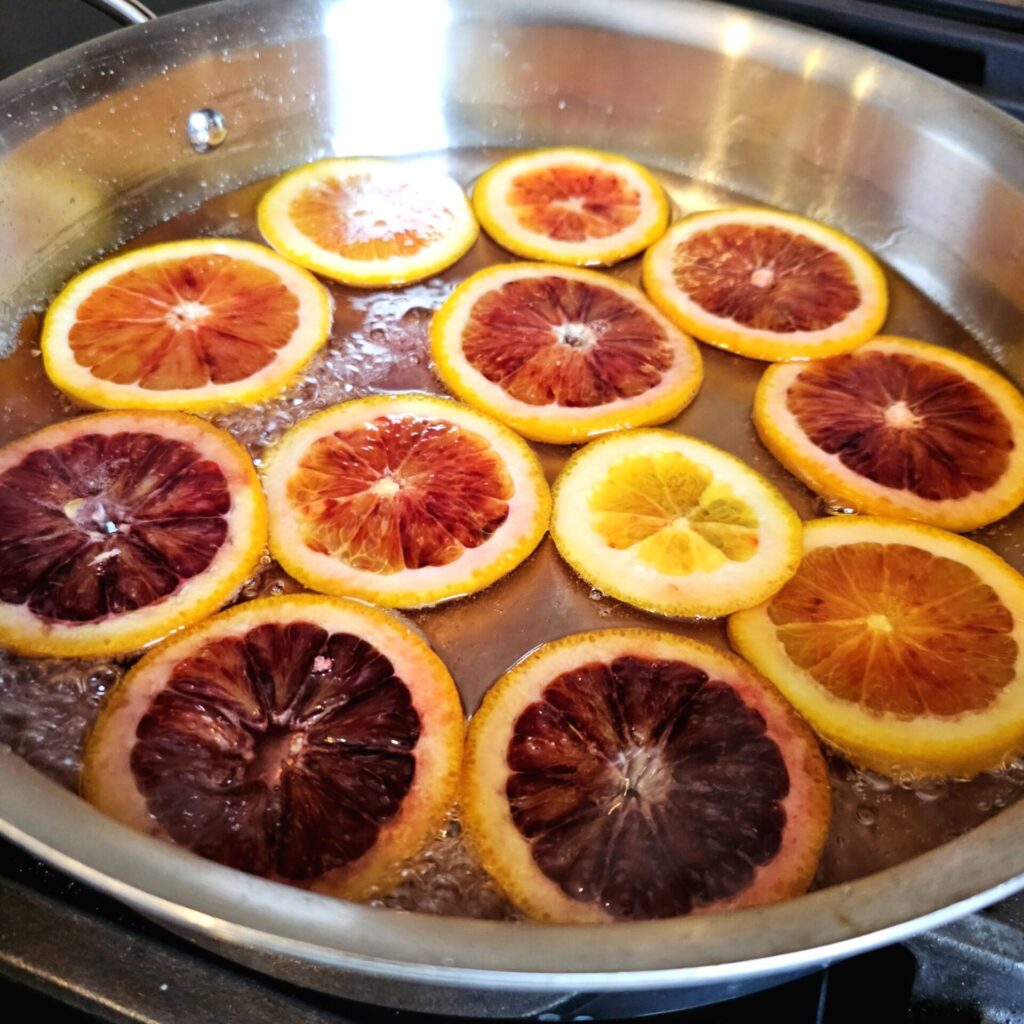
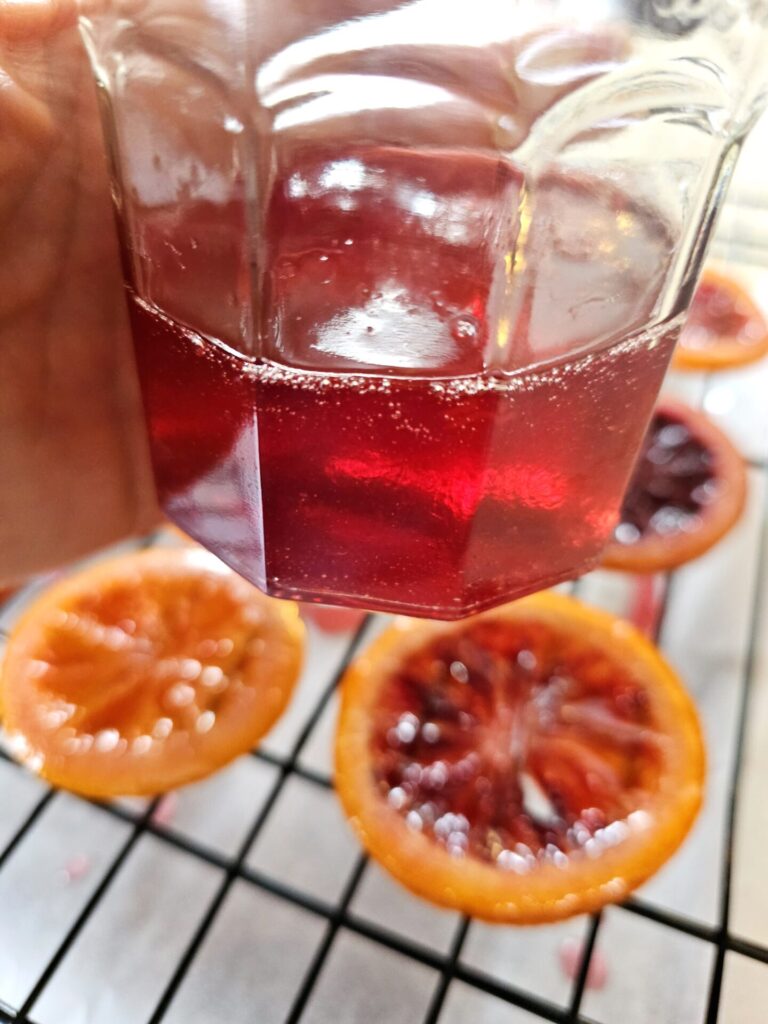
For this recipe, we combine one cup of water with one cup of sugar in a shallow pot or 3-inch deep sauce pan. Bring the mixture to the boil until the sugar has dissolved and reduce the heat to medium-low, essentially a very gentle boil that is just above the simmer point.
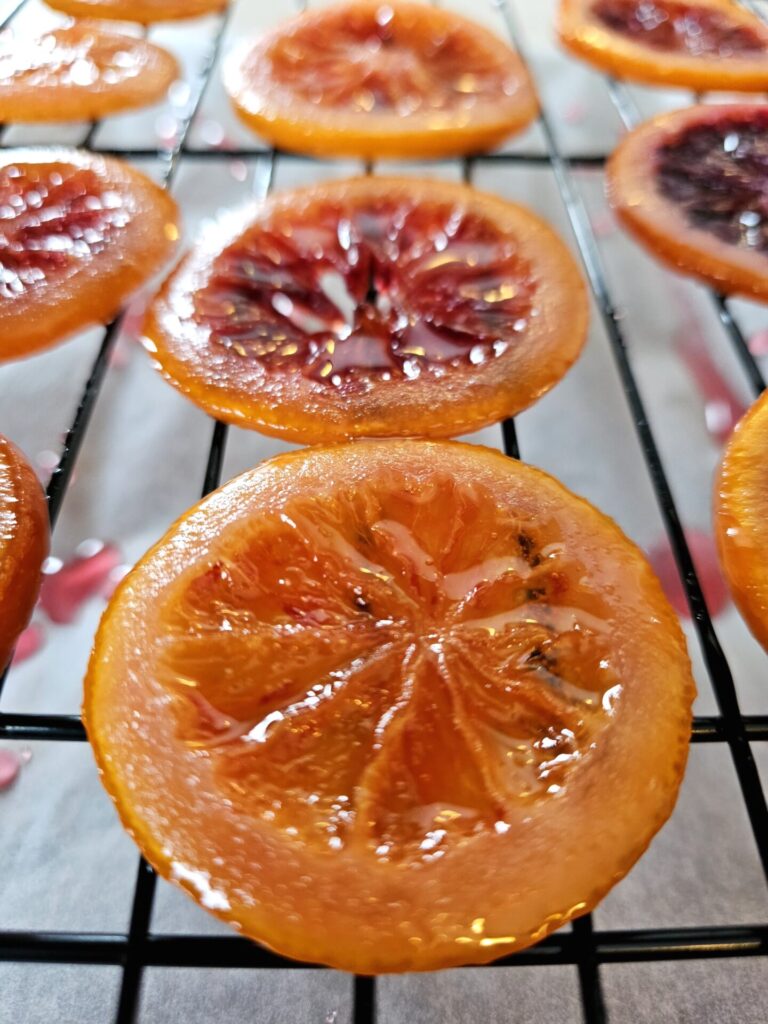
We then add the orange slices and cook them in the simple syrup for 45 minutes. I like to gently turn them over with a spoon or spatula half way through the cooking process.
After 45 minutes, the color of the orange slices will turn from opaque to translucent. Allow the syrup to cool before removing the orange slices and transferring them to a wire rack to dry out for 24 hours. This is an important step. During the 24-hour drying stage, the candied citrus dries out, firms up, and becomes easier to handle.
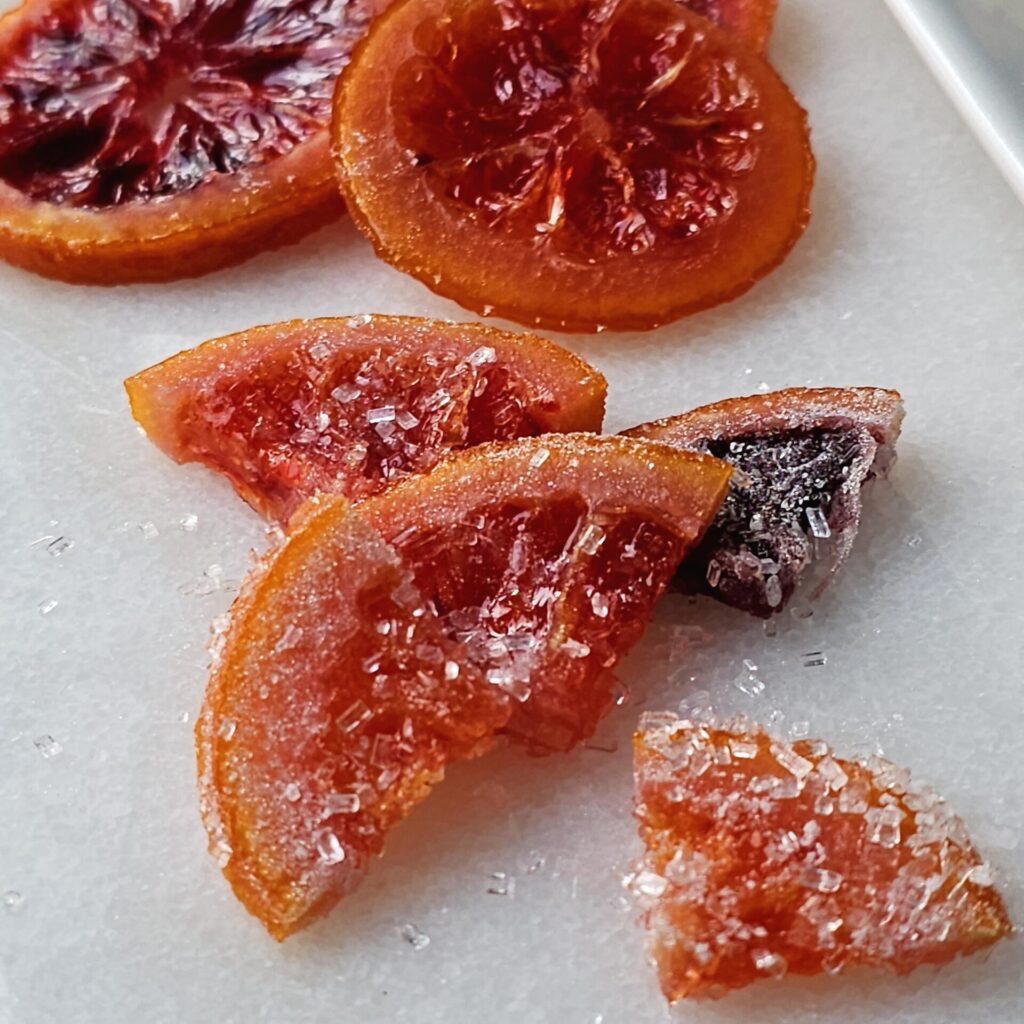
After 24 hours you can either dust the slices in granulated sugar for a crystalized look or store them “as is” in an airtight container in a single layer.
Storage Instructions
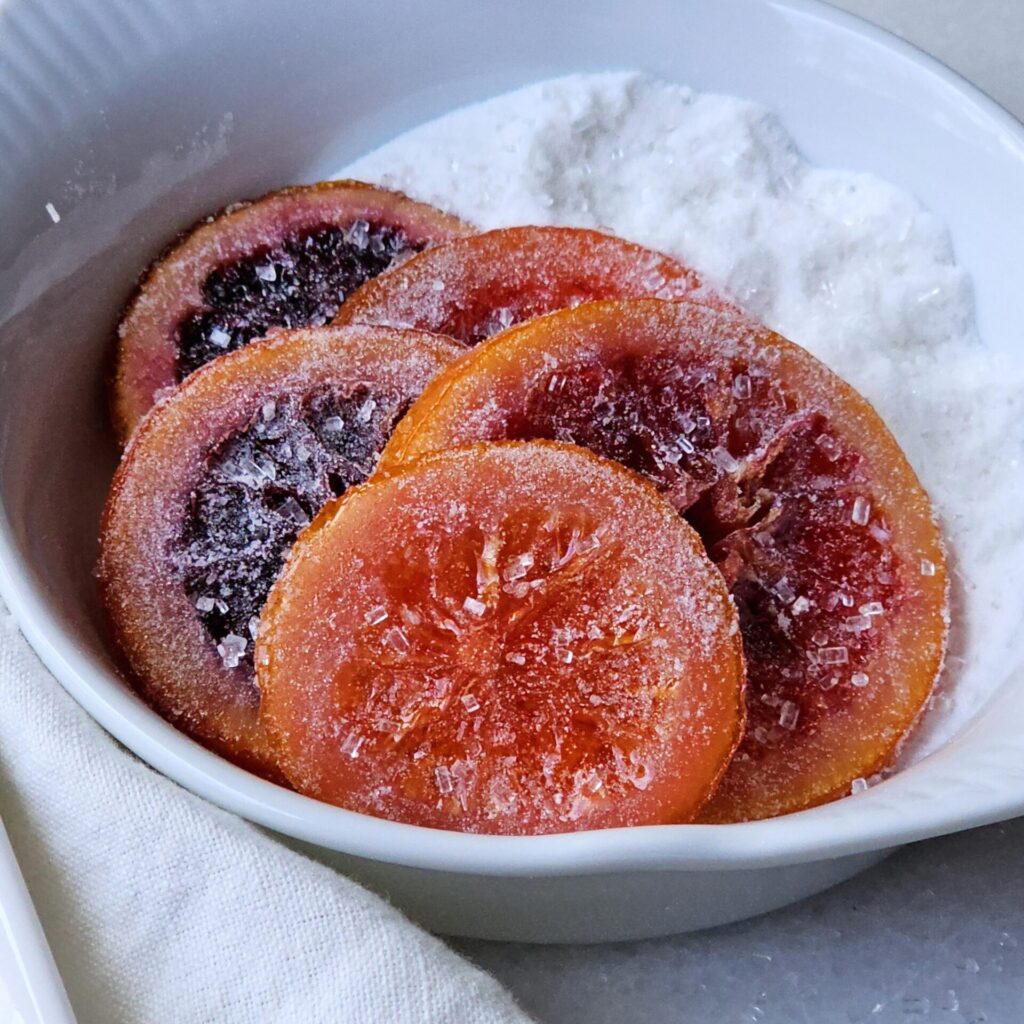
- Allow the candied blood orange slices to cool and dry completely after making them. This ensures they don’t stick together.
- Once dry, layer the slices in an airtight container. To prevent sticking, place parchment paper or wax paper between the layers.
- Store the container in a cool, dry place at room temperature or in the refrigerator.
- Save that blood orange simple syrup! It’s delicious in sparkling water or mixed in a cocktail. It will keep in the refrigerator in an airtight container for up to 3 weeks.
Shelf Life of Candied Blood Orange Slices
- At room temperature, candied blood orange slices can last up to 1 week, provided they are stored in an airtight container away from moisture and heat.
- In the refrigerator, they can last up to 2-3 weeks, although their texture may become slightly softer over time.
- For longer storage, you can freeze them! Place the slices on a parchment-lined tray to freeze individually before transferring them to a freezer-safe bag or container. They’ll keep for up to 3 months this way.
Pro Tip: If the slices become sticky, dust them lightly with granulated sugar before storing. This can help preserve their texture.
Let’s Get Social!
And there you have it—candied blood orange cheesecake squares that are as beautiful as they are delicious. These little bites of joy are a celebration of seasonal citrus and proof that dessert can be both indulgent and easy to make.
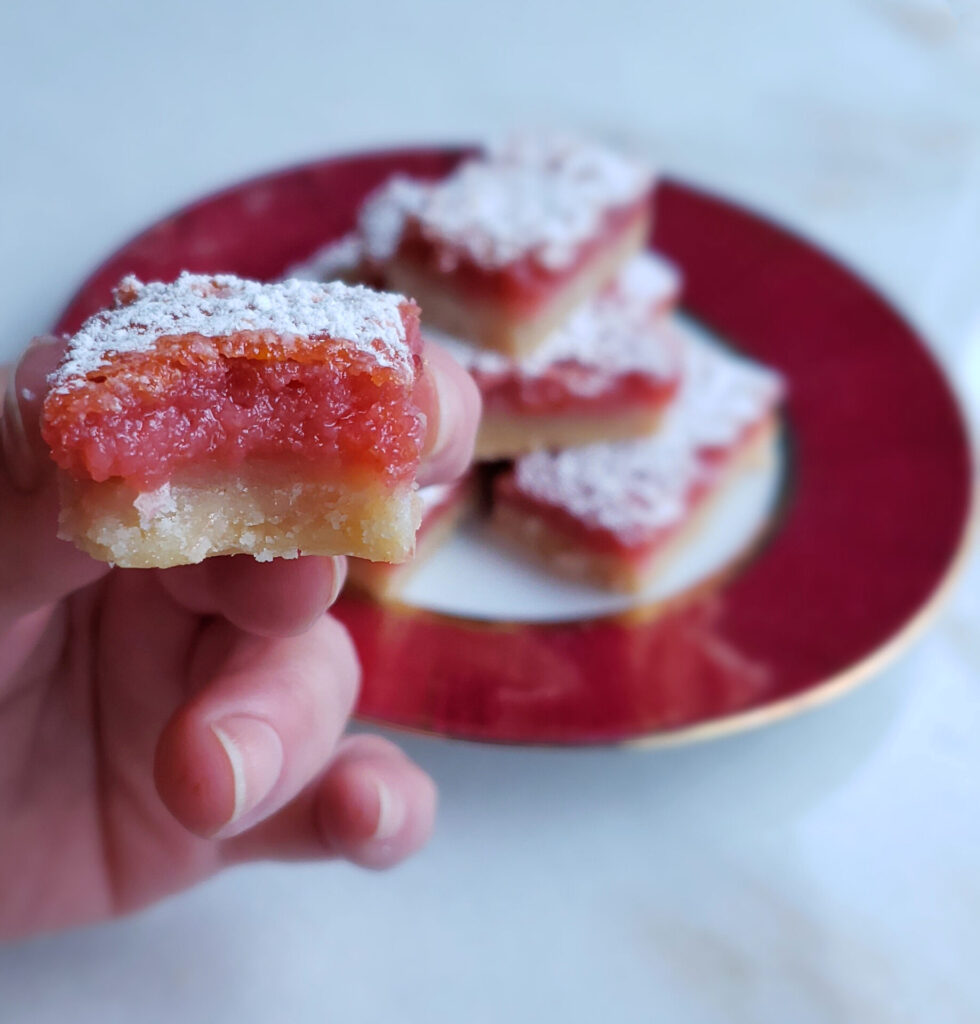
Thank you for visiting MOstly Bakes! I hope you have enjoyed this easy cheesecake recipe featuring candied blood oranges. If you’re looking for other seasonal citrus recipes, you might also enjoy this one for Tempting 2-Bite Blood Orange Bars. They’re a more subtle version of a lemon bar and such a lovely color – a definite show stopper!
If you’ve enjoyed this recipe, I’d like to invite you to subscribe to our newsletter and follow us on social media via Instagram, Facebook and Pinterest. Thank you again, for visiting, and I look forward to connecting with you there!
Blessings, and happy baking!
Irresistible 3-Layer Candied Blood Orange Cheesecake Squares
Course: DessertCuisine: AmericanDifficulty: Intermediate20
2-inch squares1
hour45
minutes30
minutes24
hoursCreamy vanilla cheesecake supported by my special crumb base and topped with a lovely slice of candied blood orange.
Ingredients
- For the candied blood orange
1 cup water
1 cup white granulated sugar
2-3 blood oranges, 1/4 inch slices
- For the sugar wafer crust
24 sugar wafer cookies
4 Tbsp. unsalted butter
4 Tbsp. white granulated sugar
- For the cheesecake batter
16 ounces cream cheese, room temperature
3/4 cup white granulated sugar
1/8 tsp. kosher salt
1 tsp. vanilla
4 large eggs, room temperature
1/3 cup heavy whipping cream, room temperature
3 Tbsp. diced candied blood orange (optional)
Directions
- Prepare the candied blood orange slices
- Combine the water and sugar in a shallow pot or 3-inch deep sauce pan. Bring the mixture to the boil until the sugar has dissolved. Reduce the heat to medium-low, essentially a very gentle boil that is just above the simmer point.
- Carefully add the orange slices to the pot and cook them in the simple syrup for 45 minutes. Gently turn them over with a spoon or spatula half way through the cooking process. The color of the orange slices will turn from opaque to translucent.
- After 45 minutes, remove the pan from the heat. Allow the syrup to cool before removing the orange slices and transferring them to a wire rack to dry out for 24 hours.
- After 24 hours you can either dust the slices in granulated sugar for a crystalized look or store them “as is” in an airtight container in a single layer.
- Prepare the cheesecake crust
- Prepare a 9-inch x 13-inch baking pan by spraying the base with nonstick cooking spray. Line the pan with parchment paper and press out any air bubbles. Allow the parchment to overlap the pan by 2 inches all around. Start in the center and work your way up the sides of the pan.
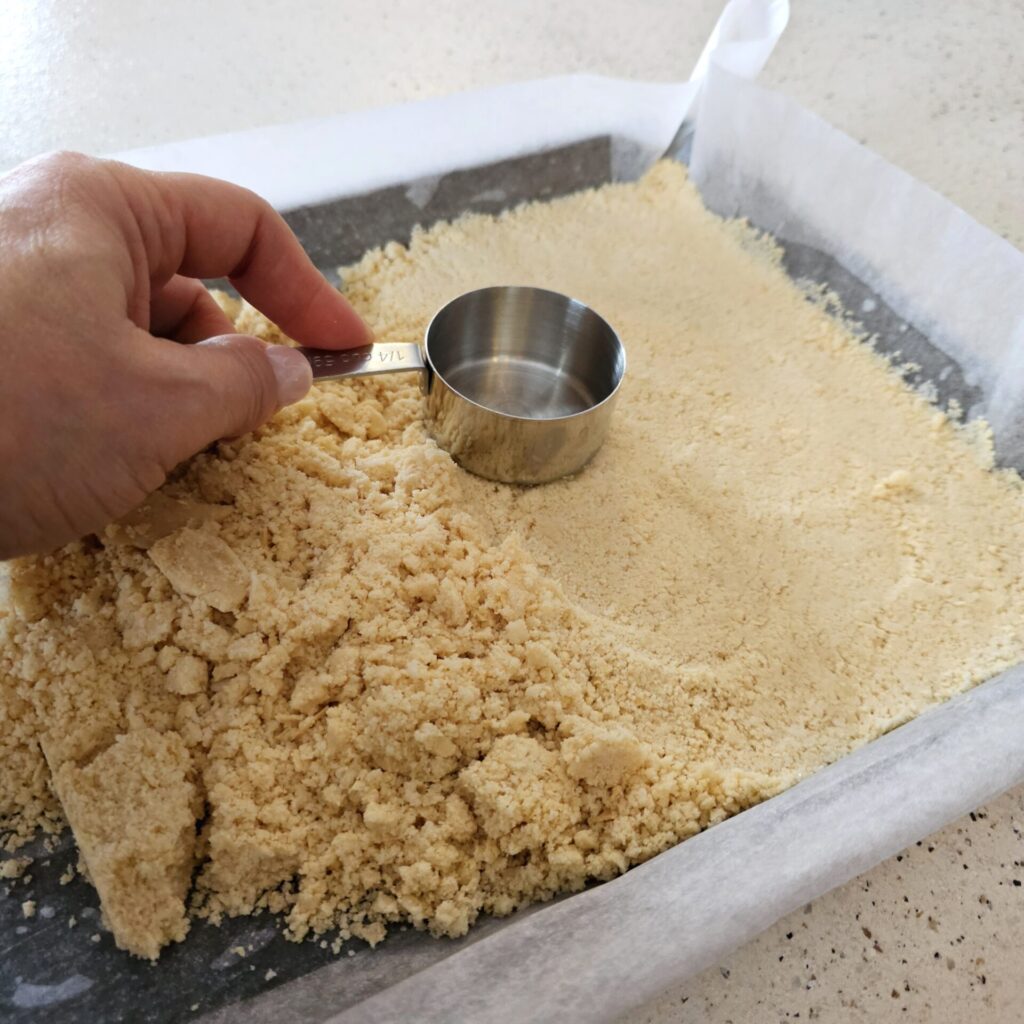
- Combine the sugar wafer cookies, butter and sugar in a large capacity food processor, pulse approximately 25 times, until the cookies are crushed and the crust resembles the consistency of wet sand.
- Pour the crust into the cake pan and press flat with the back of a measuring cup. Make sure the crust is evenly distributed. Set aside.
- Prepare the cheesecake batter
- Preheat the oven to 350 degrees F.
- Using the paddle attachment for a stand mixer, over medium speed, combine the cream cheese, sugar, salt and vanilla. Cream together until smooth and completely incorporated. Approximately 3 minutes. Scrape down the sides and bottom of the bowl.
- Add the eggs one at a time. Mix over medium speed until completely incorporated. Scrape down the sides and bottom of the bowl between each egg.
- Add the heavy whipping cream over medium-low speed and mix for another 2 -3 minutes. The batter should be smooth, without any clumps.
- Optional step – If desired, you can fold in 3 Tbsp. of diced candied blood orange into the batter for an added pop of flavor and color.
- Pour the batter into the prepared baking pan. Place the cheesecake in the center of the oven and bake at 350 degrees F. for 25-30 minutes until the cheesecake is sufficiently set in the middle so that it is dry to the touch when you pat it with your finger. Do not overbake or the cheesecake may crack.
- Remove the cheesecake from the oven and allow to cool at room temperature before transferring to the refrigerator to chilll and set uncovered overnight.
- Finish the cheesecake bars
- Remove the cheesecake from the refrigerator. Grasp the overlapping parchment paper and gently lift the cheesecake out of the baking pan in one piece. Trim the edges of the cheesecake by 1/4 inch all around. Cut the cheesecake into 2-inch squares. After trimming the cheesecake sides, you should have 20, 2-inch squares.
- Top each square with a 1/4 wedge of candied blood orange. Save the remaining slices of blood orange for another use or serve on the side with the cheesecake squares.