Don’t let this recipe for Deliciously Easy No Springform Needed Cheesecake throw you for a loop. You don’t need a springform pan to make a deliciously creamy, baked cheesecake. You just need an 8-inch cake pan and the insider’s scoop on how to release it from the pan.
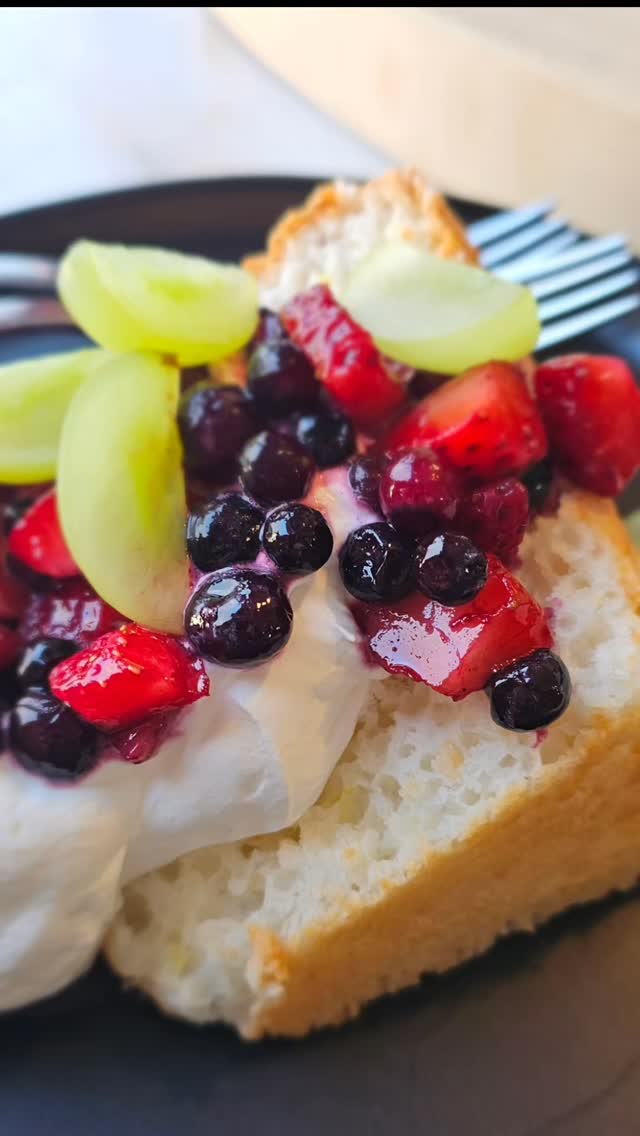
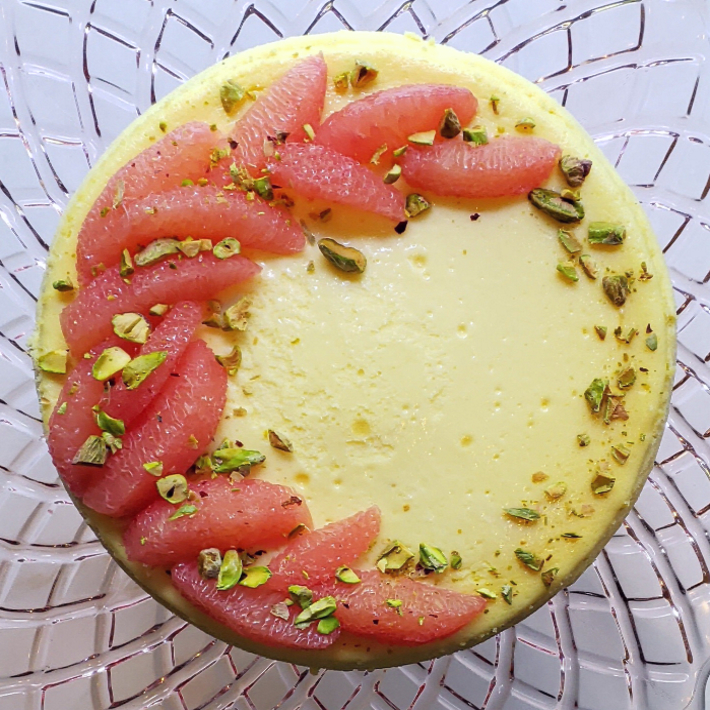
My favorite way to serve this no springform needed cheesecake is topped with either fresh fruit of a good fruit sauce like my Thyme Infused Blueberry Sauce. So delicious!
Jump to RecipeTable of Contents
So, what kind of cheesecake is this Deliciously Easy No Springform Needed Cheesecake anyway?
There are several variations of cheesecake. However, this recipe for Deliciously Easy No Springform Needed Cheesecake has characteristics of the primary two: the traditional New York Style Cheesecake and the Traditional Cheesecake.
New York Style Cheesecakes are known for being tall, rich, and dense with a creamy consistency. Their foundation consists of cream cheese and sour cream which gives them their firm texture. And they almost always sport a graham cracker crust. If you ask a purist how a slice should be served, they’ll likely say plain or with a fruit sauce on top.
Traditional Cheesecakes are lighter, fluffier, a little sweeter and not nearly as tall. A hot water bath is often used to keep them from cracking. And you will often see the baking technique starting at a higher temperature before lowering to finish the bake.
And then you have your No-Bake Cheesecake variety. These cheesecakes skip the eggs and often rely on gelatin to help stabilize them. Because they lack the same structural components of baked cheesecakes, they are often much softer.
Of course, you’ll see a fair amount of experimentation in all three categories as chefs and home cooks boldly incorporate other forms of dairy such as goat cheese or ricotta. And you’ll even find some very good plant-based options out there.
Blurring the cheesecake lines
As much as I have a soft spot for tradition, there’s a side of me that won’t hesitate to trade one old-time favorite for a new one. Such is the case with graham cracker crusts on cheesecakes. I mean no disrespect to the graham cracker. They are the foundation of any good s’more. And they make a wonderful New York Style Cheesecake base, but for this recipe, I wanted the structure of a NYC style crust with a different flavor.
The batter for this Deliciously Easy No Springform Needed Cheesecake is very delicate in both flavor and texture – like a traditional style cheesecake. I wanted a crust that would coax out the vanilla flavor, which is why I turned to Voortman Vanilla Wafer Cookies. The sugar wafers are quite sweet, but their sweetness is cut by the cheesecake. And in turn, the cheesecake’s flavor is enhanced by the crust.
The sugars in the crust caramelize during the baking process to provide a good, sturdy crust, which is paramount for a cheesecake that doesn’t require a springform pan or a side crust. Plus, this crust doesn’t need to be prebaked like other cheesecake crusts. All in all, it makes for a faster, easier and tastier crust.
So how do you get the cheesecake out of the pan anyway?
That’s a fair question. Steps 11 – 15 provide detailed notes on how to loosen and remove the cheesecake from the pan, but the short version is provided here:
- Prepare the pan by lining the bottom with an 8 inch circle of parchment paper. This will provide a non-stick lining between the crust and the pan.
- Before removing the cheesecake from the pan, it’s important to run a knife around the inside edge of the pan. This ensures the sides of the cheesecake are separated from the pan.
- Warm the bottom of the pan over a low-heat burner. The purpose of this step is to melt the fats just enough to loosen the crust from the bottom of the pan. You’re not getting it super hot. Just warm enough to break the seal.
- Finally, you’re using two plates to do “the flip” as I like to call it. The first inverts the cheesecake so it’s sitting upside down on a plate. The second flip rights the cheesecake on its crust.
Go forth and conquer the world of cheesecake

Now that you know the trick to making a cheesecake without a pan, you can boast your mad cheesecake-making skills to the world by sharing with them the secret to this Deliciously Easy No Springform Needed Cheesecake.
If you enjoy this easy cheesecake recipe, you’re going to love my recipe for Decadent 2-Layer Orange Nutella Cheesecake. It’s a variation of this easy cheesecake recipe that’s absolutely worth breaking your diet for. Layers of vanilla orange cream and chocolate hazelnut cheesecake batter are swirled together inside a dark chocolate crust. Fresh orange slices lend a pop of clean tartness that help balance this rich dessert. If chocolate, orange and cheesecake are among your list of favorites, this easy cheesecake recipe is especially for you.
Let’s Get Social!
Thank you for visiting MOstly Bakes! I hope you have enjoyed this easy cheesecake recipe. If you’re looking for other holiday recipes, I’d like to invite you to subscribe to our newsletter and follow us on social media via Instagram, Facebook and Pinterest. Thank you again, for visiting, and I look forward to connecting with you there!
Blessings & enjoy!

No Springform Needed Cheesecake
Course: DessertCuisine: AmericanDifficulty: Intermediate10
servings20
minutes50
minutes8
hoursA classic vanilla cheesecake for any occasion.
Ingredients
- For the sugar wafer crust
12 Vanilla Sugar Wafer Cookies
2 Tbsp. butter
2 Tbsp. granulated sugar
- For the cheesecake batter
16 oz. regular cream cheese, room temperature
3/4 cup granulated sugar
1/8 tsp. kosher salt
1 tsp. vanilla
4 large eggs, room temperature
1/3 cup heavy whipping cream, room temperature
- For baking the cheesecake
1 cup hot water for steaming
Directions
- Preheat the oven and prepare the baking pan
- Place a lipped baking pan in the center of the oven and preheat to 350 degrees F.
- Line the bottom of an 8-inch round cake pan with parchment paper. Set aside.
- Prepare the crust
- Combine the sugar wafer cookies, butter and sugar in a large capacity food processor, pulse approximately 25 times, until the cookies are crushed and the crust resembles the consistency of wet sand.
- Pour the crust into the cake pan and press flat with the back of a measuring cup. Make sure the crust is evenly distributed. Set aside.
- Prepare the batter
- Using the paddle attachment for a stand mixer, over medium speed, combine the cream cheese, sugar, salt and vanilla. Cream together until smooth and completely incorporated. Approximately 3 minutes. Scrape down the sides and bottom of the bowl.
- Add the eggs one at a time. Mix over medium speed until completely incorporated. Scrape down the sides and bottom of the bowl between each additional egg.
- Add the heavy whipping cream over medium-low speed and mix for another 2 -3 minutes. The batter should be smooth, without any clumps.
- Pour the batter into the prepared 8-inch cake pan. Place the cheesecake in the center of the heated pan. Pour 1 cup of hot water on the heated pan to activate the steam.
- Bake the cheesecake at 350 degrees F. for 50 minutes. The cheesecake will rise along the sides of the pan like a souffle and the top of the cheesecake should be smooth with just a hint of browning. Do not over bake as this will cause the cheesecake to split in the center.
- Remove the cheesecake from the oven and gently run a knife between the edge of the pan and the cheesecake. Transfer the cheesecake to the refrigerator to cool uncovered overnight. The cheesecake will recede a little as it cools and that’s normal.
- Removing the cheesecake from the pan
- Have two plates ready – one just for flipping and the one you wish to serve your cheesecake on.
- Gently run a paring knife along the inside rim of the cake pan to separate the cheesecake from the sides of the pan.
- Turn on a stove burner to the lowest setting. Holding the top sides of the cake pan, gently run the bottom of the pan over the warm burner for roughly 5 – 10 seconds. Be sure to heat the entire bottom surface of the pan. Give the cheesecake pan a good, vigorous shake.
- You should start to feel the cheesecake come loose from the pan. Once you do, invert the pan on to the first plate and lift the pan away from the cheesecake. You should now have the base of your cheesecake facing up. Remove the parchment paper.
- Place the second plate over the base of the cheesecake. Balancing both plates – one in each hand – invert the plates again. Your cheesecake should now be facing right side up on your presentation plate.
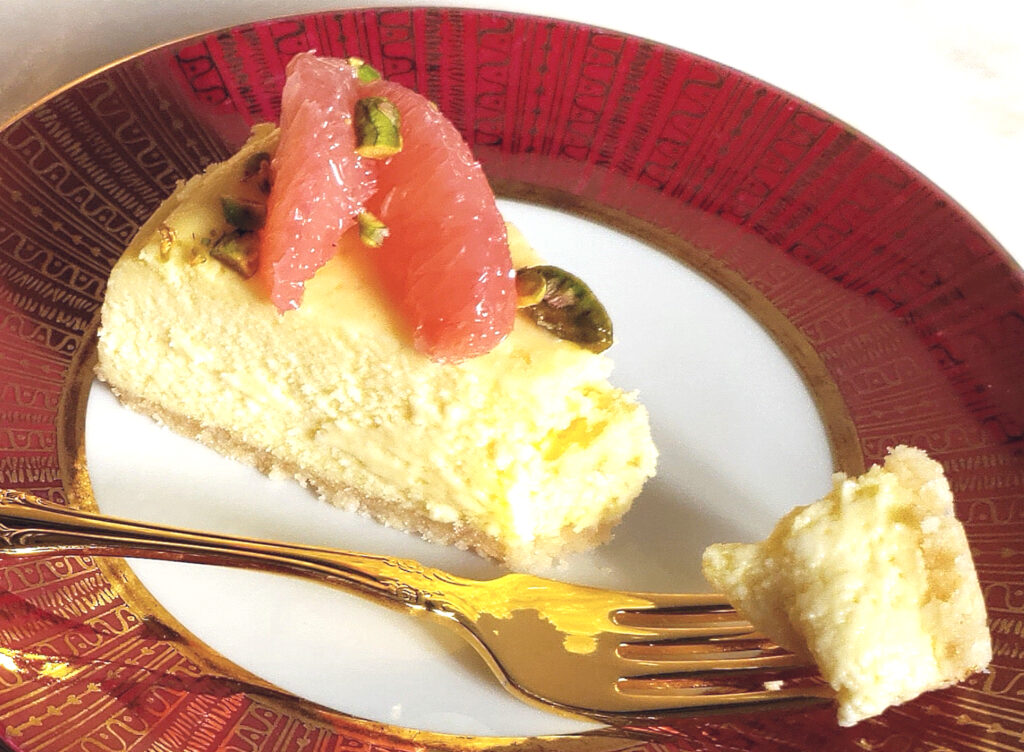
- Top with fresh fruit or your favorite fruit sauce.
- Cheesecake can keep for up to one week in the refrigerator.
Notes
- Please note: As an Amazon Associate I earn from qualifying purchases.