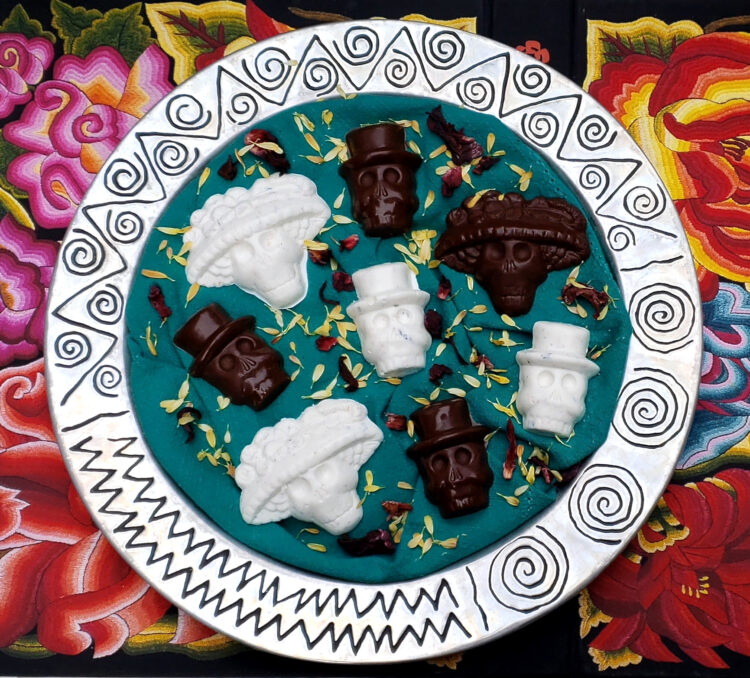
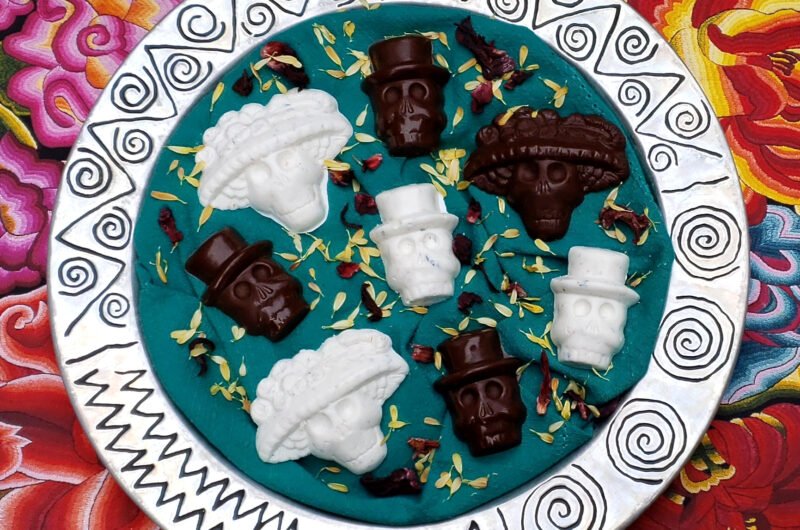
These Easy Chocolate Calavera Candies 2 Ways can be made with either dark or white chocolate and filled with dried cranberries, pepitas, toasted coconut and hibiscus flowers. If you’re looking for a fun and easy recipe to make with the kids this October, look no further.
Jump to RecipeHibiscus flowers bring fruity tartness to a sweet treat
I like to add edible, dried hibiscus flowers to the white chocolate version of this recipe. They add a pop of color and a tartness similar to raspberries that balanced nicely with the sweetness of the coconut and candy melts. I like the Kate Naturals brand. They are certified organic, non-GMO and dried naturally.
The flowers can be used for making tea, syrups and other desserts, such as my recipe for Vegan Hibiscus Gelee with Coconut Milk. If you’re looking for an easy, healthy dessert that you can make once and enjoy over the course of the week without feeling like you’re sabotaging your health goals, give this recipe for Vegan Hibiscus Gelee with Coconut Milk a try. Even without the coconut milk layer, it’s delicious.
The only other special equipment you will need for these Easy Chocolate Calavera Candies 2 Ways is a sugar skull candy mold. If you have a local candy supply company, you may want to try there first.
History and significance of sugar skulls

The word Calavera in Spanish literally means “skull”. But, you might also see it used interchangeably to mean the entire skeleton. In Mexico, sugar skulls go hand-in-hand with the November 2nd Day of the Dead Celebration (Dia de Los Muertos). This recipe for Easy Chocolate Calavera Candies 2 Ways is an homage to this beautiful holiday.
Don’t let the name fool you. It’s not a scary night. And even though you are remembering loved ones who have passed, it’s also not a time of mourning. If you’re interested in learning more about day of the dead, the Spruce Eats offers a good article on the History of Dia de los Muertos Sugar Skulls.
What these Easy Chocolate Calavera Candies 2 Ways are to me
From a very personal perspective, when I see a sugar skull, I am instantly cheered. They do not signal death or loss to me. Quite the opposite. They are a celebration of life. For me, sugar skulls are a lovely way to square up with death – an understanding that we are only separated from our loved ones for a little while. I also believe they provide a way to help little ones better understand and process loss.

For those who have been following along either here or on social media, you know my mother was Italian. However, this recipe for Easy Chocolate Calavera Candies 2 Ways hearkens back to another side of my childhood – my Mexican half.
My father’s family came from Guadalajara, Mexico. He grew up in a large, migrant family and when I was young, it was important to him that I knew my roots and who I was. When my daughter was little, I wanted her to have a connection to her Mexican heritage as well. Celebrating Day of the Dead and integrating some of those cultural traditions into her childhood were important to me. And she holds them close today.
Sweet offerings
My father used to say that your culture was in your heart. Food, traditions, music, history, a linguistic understanding of language – all play a part in better understanding myself and others as well. I’m a mix, so I’ve always felt like I had a foot in two different worlds. Sometimes that has been a blessing and sometimes a challenge, but I am grateful for the unique perspective it gives me.
I’ve heard it said that when things come to an end, we often look back to the beginning. For me, there is comfort in family, traditions, culture and of course the food that always seems to weave itself into the fabric – especially when facing a loss. I think that’s why I enjoy making these chocolate candies so much. So if it helps you or someone you know, share the history of Day of the Dead. And celebrate the sweeter side of life and love with a Calavera candy or two.
Easy Chocolate Calavera Candies 2 Ways
Course: DessertCuisine: MexicanDifficulty: Easy1
candy5
minutes15
minutes35
minutesIngredients
- Dark Chocolate Calaveras
1 1/2 cups Wilton Dark Cocoa Candy Melts
2 Tbsp. sweetened, dried cranberries, chopped fine
2 Tbsp. toasted & salted pepitas, chopped fine
- White Chocolate Calaveras
1 3/4 cup Wilton Bright White Candy Melts
2 1/2 Tbsp, sweetened coconut, toasted and chopped fine
1 1/2 tsp. dried hibiscus flowers, crushed
Directions
- Prepare the dark chocolate calaveras
- Prepare the molds by cleaning and completely drying them. Be sure there is no water remaining. Set aside.
- Finely dice and measure out 2 Tablespoons each of the dried cranberries and roasted, salted pepitas. Set aside.
- In a double boiler over low heat, melt the candy wafers. Stir constantly until completely melted and smooth. Approximately 3 -5 minutes.
- Add the cranberries and the pepitas to the melted candy mixture and blend thoroughly.
- Spoon the chocolate candy mixture into the molds until just filled. Gently tap the molds on the counter to remove any air bubbles. You can also use a toothpick to help break any air bubbles.
- Place the molds in the refrigerator for 15 minutes until completely set. Invert the molds on a flat surface to release the candies. The chocolates should easily release from the molds when slight pressure is applied to them.
- Prepare the white chocolate calaveras
- Prepare the molds my cleaning and completely drying them. Be sure there is no water remaining. Set aside.
- In a small saute pan, over medium-low heat, toast 2 1/2 Tablespoons of coconut. Approximately 2-3 minutes. Remove from the pan and spread on a plate so the coconut can cool completely. Add two Tbsp. of coconut to the melted white chocolate. Reserve 1/2 Tbsp. of the coconut to decorate the back of the candies.
- Place a few hibiscus flowers into a plastic zipper bag. Using the back of a measuring cup or other flat surface, gently crush the hibiscus flowers. Add 1 tsp. to the melted white chocolate and coconut mixture. Reserve 1/2 tsp. of the crush hibiscus flowers for decorating the back of the candies.
- Follow steps 1 – 3 the same as for the dark chocolate calaveras. For step 4, substitute 2 Tbsp. of toasted coconut and 1 tsp. of dried hibiscus flowers.
- Spoon the chocolate candy mixture into the molds until just filled. Gently tap the molds on the counter to remove any air bubbles. You can also use a toothpick to help break any air bubbles. Sprinkle the backs of the candies with the reserved coconut and hibiscus flowers.
- Place the molds in the refrigerator for 15 minutes until completely set. Invert the molds on a flat surface to release the candies. The chocolates should easily release from the molds when slight pressure is applied to them.
Notes
- Can I use unsweetened coconut flakes instead? Absolutely.