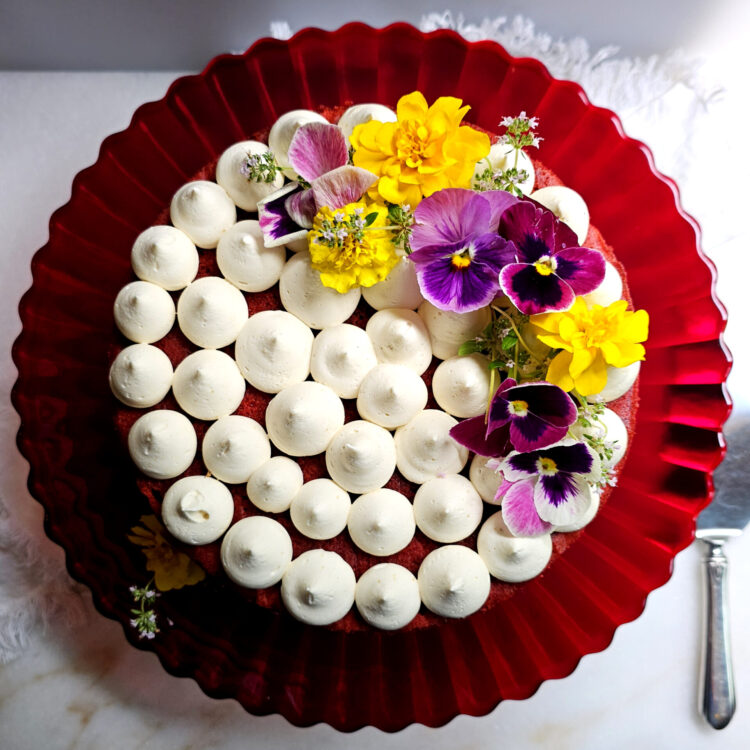
This recipe for Irresistible Appalachian Buttermilk Velvet Cake 2 Ways is an homage to my husband’s great grandmother’s red velvet cake recipe with a lesser-known but delicious Ermine frosting.
Red Velvet, with its mesmerizing crimson hue and delicate texture, has become a symbol of indulgence and celebration. When it comes to classic desserts, a Red Velvet Cake with luscious Ermine frosting stands out as a timeless favorite. This delightful pairing of moist and velvety cake layers with an airy Ermine frosting is sure to impress any crowd. In this blog post, we’ll dive into the origin of the cake and frosting, their unique qualities, and a step-by-step guide on how to prepare this delectable frosting to elevate your cake to new heights.
Jump to RecipeTable of Contents
Origin and Unique Qualities of Ermine Frosting
To be honest, the first time I saw Mama Long’s red velvet cake recipe with Ermine frosting I was a little put off. It was strange and new to me. I was not familiar with a boiled milk and flour frosting. However, after making it a few times, I began to develop a fondness for her frosting. This recipe for Irresistible Appalachian Buttermilk Velvet Cake 2 Ways is a variation on her original recipe for both red velvet cake and her Ermine frosting. Thank you Mama Long for sharing this recipe with the family. I hope this 2.0 version makes you proud.
Ermine frosting, also known as boiled milk frosting or flour frosting, boasts a rich history dating back to medieval Europe. This European gem gained popularity due to its light texture and remarkable ability to complement a wide range of cake flavors. Unlike traditional buttercream frostings, Ermine is made by cooking flour and milk into a thick, smooth paste before being incorporated into a butter and sugar mixture. This process results in a velvety, less sweet frosting that’s perfect for balancing the indulgent sweetness of any cake.
Incorporating Ermine frosting into your Red Velvet recipe adds a touch of sophistication and nostalgia to this classic treat. The combination of the cake’s vibrant red hue, tender crumb, and this velvety, not-too-sweet frosting creates a culinary masterpiece that is sure to become your new cherished favorite.
The striking allure of the color red

The origins of Red Velvet Cake remain shrouded in mystery, with several theories vying for attention. One prevailing belief is that this delectable creation emerged in the early 20th century, possibly gaining popularity during the Great Depression era as a clever marketing ploy by food companies to promote their products. Another theory traces its roots to Southern cuisine in the United States, where its color was achieved through the reaction of natural cocoa powder and buttermilk, common ingredients in the region.
Central to Red Velvet Cake’s allure is its striking red color. This color is achieved through a chemical reaction between natural cocoa (not Dutch Processed) and acidic ingredients like buttermilk and vinegar. This reaction delivers a more subtle color change. Today, modern recipes often rely on red food coloring to intensify the shade. This vibrant crimson hue has made Red Velvet desserts an enchanting centerpiece at weddings, birthdays, and holidays, evoking feelings of romance and celebration.
Red Velvet’s history is as captivating as its beautiful hue. Whether you’re a history enthusiast or a dessert lover, exploring the origins of this iconic treat adds an extra layer of appreciation to every slice. From its mysterious beginnings to its status as a beloved classic, Red Velvet Cake continues to delight, reminding us that sometimes the most enchanting tales are found on our dessert plates.
Today, Red Velvet has evolved beyond its traditional form, inspiring a myriad of adaptations. Bakers and chefs experiment with different fillings, frostings, and presentations, from cupcakes and layered cakes to cake pops and even savory dishes, showcasing its versatility and enduring appeal. The cake’s unique combination of a delicate crumb, subtle chocolate flavor, and luxurious cream cheese or Ermine frosting has captured the hearts and palates of dessert enthusiasts worldwide.
Making this Irresistible Appalachian Buttermilk Velvet Cake 2 Ways
In this recipe, I keep to the tradition of using buttermilk and vinegar to give the cake its tender texture, but I also call on the addition of red food coloring to boost the color. So what makes this recipe a 2-way recipe?

Whether or not you choose to add the food coloring and cocoa powder is up to you. The natural color change resulting from a chemical reaction between the buttermilk and the cocoa powder is very subtle – like a mauve color. If you want a vibrant red, use the food coloring to boost the color.
The magic of Mama Long’s cake is the tender crumb and overall flavor of the cake. Without the cocoa powder and food coloring you have a very moist and tender cake. By eliminating the 2 1/2 Tablespoons of cocoa powder, you can change up this cake recipe from red to a blue velvet cake or any other color you desire.
I also made some substitutions and additions to this recipe. Although I like the taste of the boiled milk, I found I actually preferred the taste of unsweetened oat milk when I was experimenting with making this recipe frosting recipe vegan. Unsalted vegan butter can also be substituted for regular butter in the frosting recipe.
Try as I did, I just couldn’t get the taste and texture of the cake to a point where I felt at ease posting a vegan version that used neither egg nor butter in the mixture. The original cake recipe called for vegetable shortening, not butter, but I preferred the taste of butter to shortening. I also added a blend of vanilla and almond extract to the mixture to round out the flavor of this bake.
Drawing inspiration from family traditions
Although my background is Mexican and Sicilian, after 30+ years of marriage to a man who enjoys researching genealogy, I’ve developed an appreciation for the history of his Romanian, Nordic and Appalachian roots as well. In reading the blog, you may have noticed a few posts on family recipes or featured ingredients from the region of Kentucky where his grandmother’s side of the family settled.
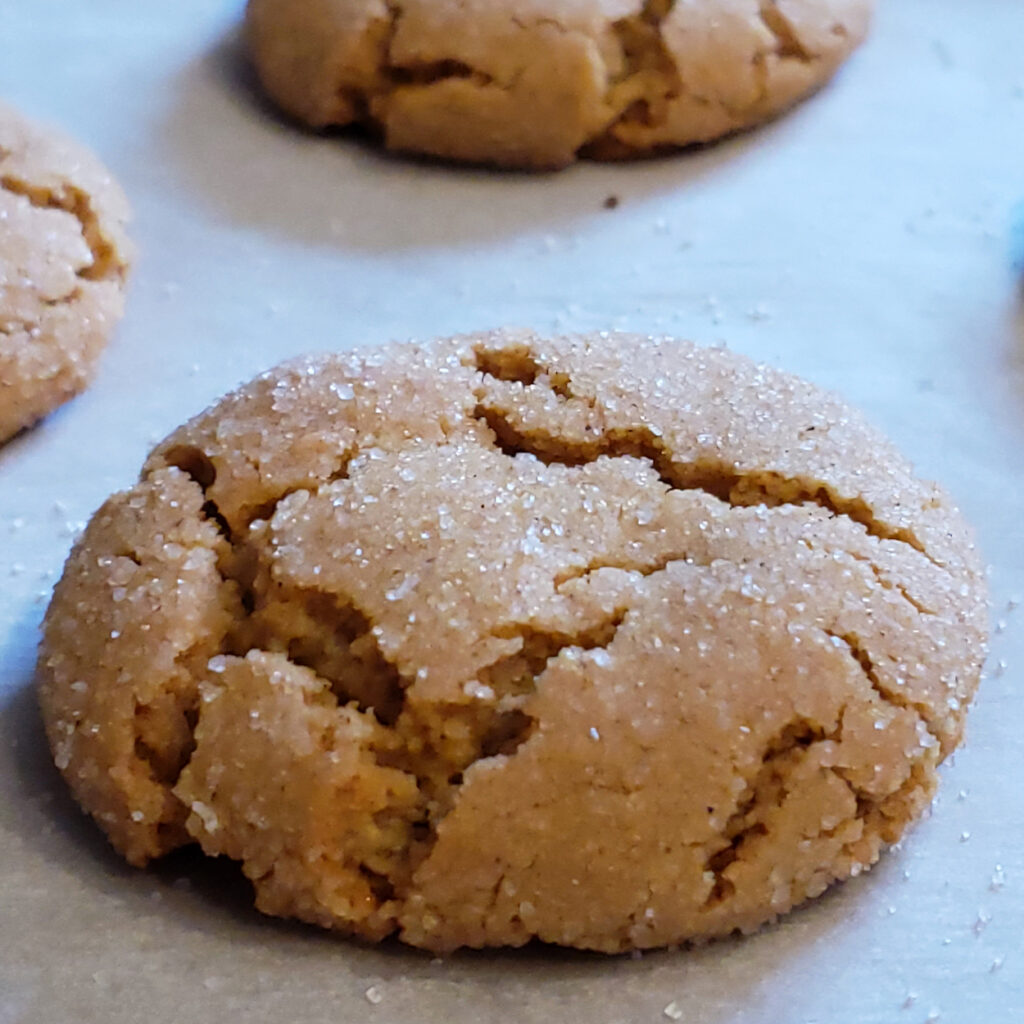
For example, my recipe for Brown Butter Sorghum Cookies is an an homage to the history and heritage of the Scots-Irish immigrants who settled in the Appalachian Mountains in the early 1700s. They contributed greatly to the history and culture of the region – bringing with them their music, agriculture, culinary and artistic heritage, as well as their desire for a new beginning.
We all hail from some other place and as we move about and settle down, we bring with us our hopes and dreams, our memories and traditions and we influence those around us just as they can have a profound influence on us. And from this harmonious sharing and blending comes a beautiful fusion that is something new and unique unto itself. I think this fusion is one of the things I love most about immigrant stories past and present.
I hope you will give this simple red velvet cake recipe a try – especially this delicious, old-world frosting. Make it your own and always share a slice with friends.
Irresistible Appalachian Buttermilk Velvet Cake 2 Ways
Course: DessertCuisine: AmericanDifficulty: Intermediate12
servings15
minutes30
minutesThis simple red velvet cake recipe features a delightful pairing of moist and velvety cake layers with the smooth and creamy Ermine frosting.
Ingredients
- For the cake
2 1/2 cups already sifted cake flour
1/4 tsp. salt
2 1/2 Tbsp. cocoa powder (optional)
1 1/2 cups white granulated sugar
1/2 cup (1 stick) unsalted, European style butter, room temperature
2 large eggs, room temperature
1 1/2 – 2 tsp. red or blue gel food coloring (optional)
1 tsp. vanilla
1 cup buttermilk
1 Tbsp. white vinegar
1 tsp. baking soda
- For the Ermine frosting
1 cup unsweetened oat milk (I prefer Chobani)
1 cup white granulated sugar
1/4 cup AP flour
1 tsp. vanilla
1/2 tsp. almond extract
1/8 tsp. salt
1 cup unsalted, European style butter
- For the cake syrup
1/2 cup water
1/2 cup granulated sugar
1/2 tsp. vanilla
1/4 tsp. almond extract
Directions
- Prepare the velvet cake batter
- Preheat the oven to 350 degrees F. Coat two 8-inch cake pans with non-stick cooking spray and line the bottoms with parchment paper. Set aside.
- Sift the cake flour. Measure out 2 1/2 cups of cake flour into a medium size bowl. Add the salt and cocoa powder (if making red velvet cake) and stir together. Leave out the cocoa powder if making another color. Set aside.
- In a 2-cup capacity measuring cup, measure out the buttermilk. Add the vinegar and baking soda and stir to combine. The mixture will bubble up and that’s ok. Set aside.
- In a large mixing bowl, cream together the butter and sugar until smooth.
- Scrape down the sides of the bowl and add the food coloring and vanilla until completely incorporated.
- Add the eggs one at a time and cream over medium speed until thoroughly incorporated and smooth. Approximately 2 minutes.
- Add half of the flour mixture to the creamed butter mixture and blend on low until incorporated. Scrape down the sides of the bowl.
- Add half of the buttermilk mixture and blend on low until incorporated. Scrape down the sides of the bowl.
- Repeat steps 7 and 8 by adding the remaining flour and buttermilk to the mixture. Scrape down the sides and bottom of the bowl to ensure all ingredients are incorporated.
- Divide the batter evenly between the two prepared cake pans. Bake at 350 degrees F. for 30 minutes or until a toothpick inserted in the center comes out clean. Allow the finished cakes to cool in their pans before removing.
- Prepare the cake syrup
- While the cake layers are baking, combine the sugar and water together in a small saucepan. Bring to a low boil and stir. Cook until the sugar crystals have dissolved. Remove from heat and add the vanilla and almond extracts.
- Set aside and allow to cool until ready to assemble the cake.
- Prepare the Ermine frosting
- In a 4-cup capacity measuring cup, stir together the flour, sugar and oat milk. Pour the mixture through a strainers directly into a small saucepan. Gently press any remaining clumps of flour through the strainer.
- Transfer the mixture to the stove. Cook over medium-low heat and bring to a gentle boil. Stir continually to ensure the mixture does not burn and lumps do not form. Continue to cook over medium heat for approximately 15 minutes until a thick paste forms or the temperature reaches 215-220 degrees F. on a candy thermometer. See notes section below on temperature.
- Transfer the hot flour mixture to a large-capacity bowl or stand mixer and begin to whip on medium-low speed. The mixture will be hot initially, so be careful not to splash yourself.
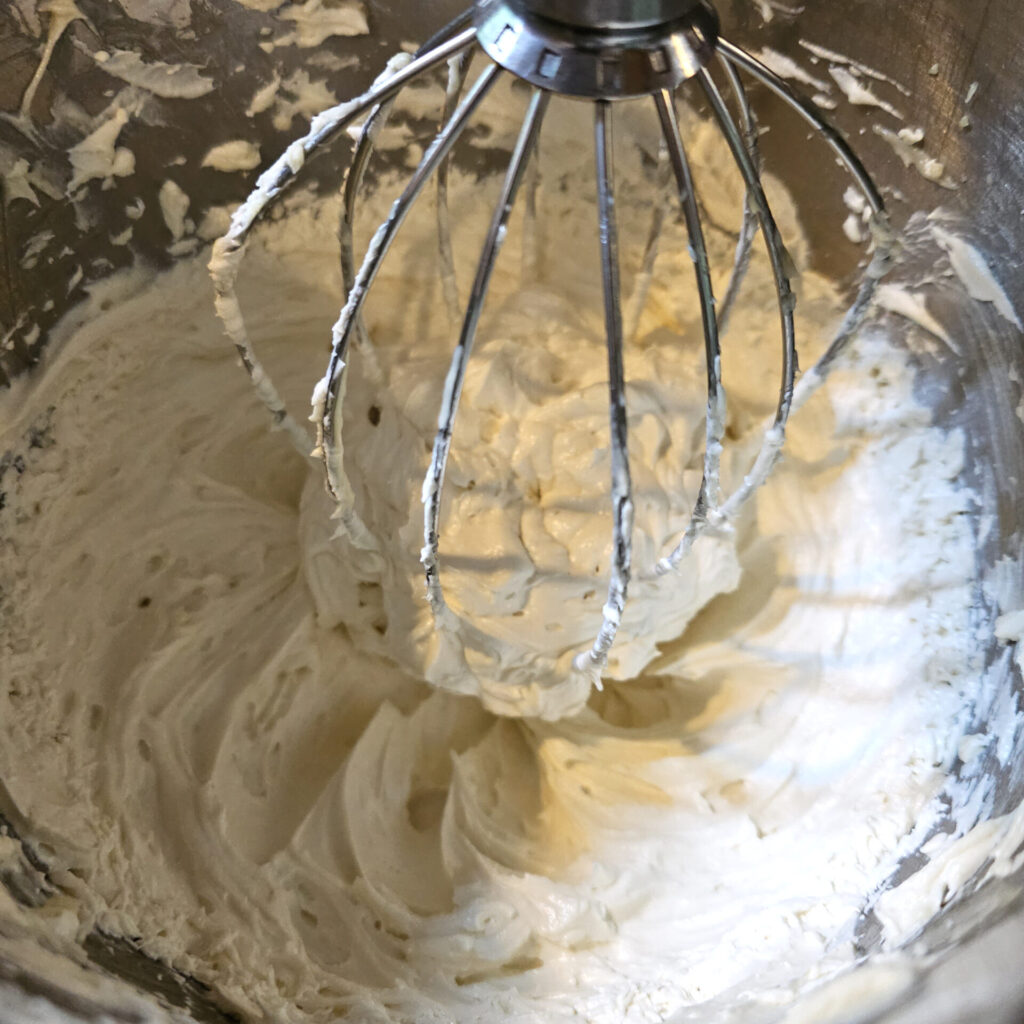
- Add 1/8 tsp. salt, vanilla and almond extract to the mixture. As it cools, it will start to increase in volume and become lighter in color and texture – approximately 10 minutes.
- Once the mixture has cooled down to room temperature, add the butter a little at a time until incorporated. Whip until light and fluffy – approximately another 5-7 minutes.
- Assemble the cake
- Optional – prepare the cake layers by slicing off the dome tops of the layers so that two even and flat layers remain. Set aside any cake scraps. Believe me, someone will eat them.
- Brush the tops and sides of both layers with the flavored syrup. Allow the syrup to soak into the layers.
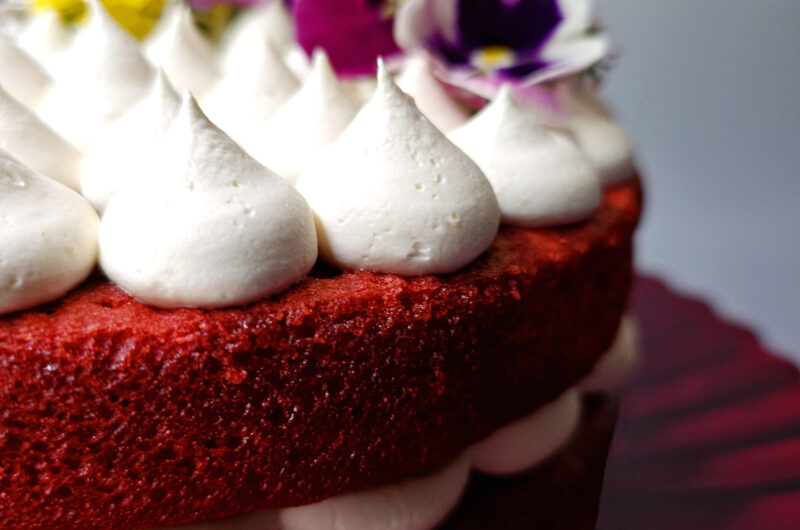
- Divide the Ermine frosting in half. Add a layer of the frosting between the two cake layers. Top the cake with the remaining half of the buttercream – leaving the sides exposed. Decorate the top of the cake as desired and serve.
Notes
- A note on the temperature of the frosting. When boiling the Ermine frosting, aim for a temperature between 215 – 220 degrees F. If the mixture is too cool, it will not fluff up appropriately during the whipping stage and you will have a runny frosting. If you go above 220 degrees F., the mixture will seize up during the whipping process because it has become too brittle.
- Making cupcakes. If you desire to make cupcakes, bake them at 350 degrees F. for approximately 18 – 20 minutes. Brush with the simple syrup and decorate according to the recipe.