This Authentic Sicilian Cannoli Custard Filling recipe has been in our family for generations. I’m told we have always used a custard filling instead of one made with ricotta. This delicate cream custard features warm vanilla and cinnamon notes, fresh orange zest, and dark chocolate shavings.
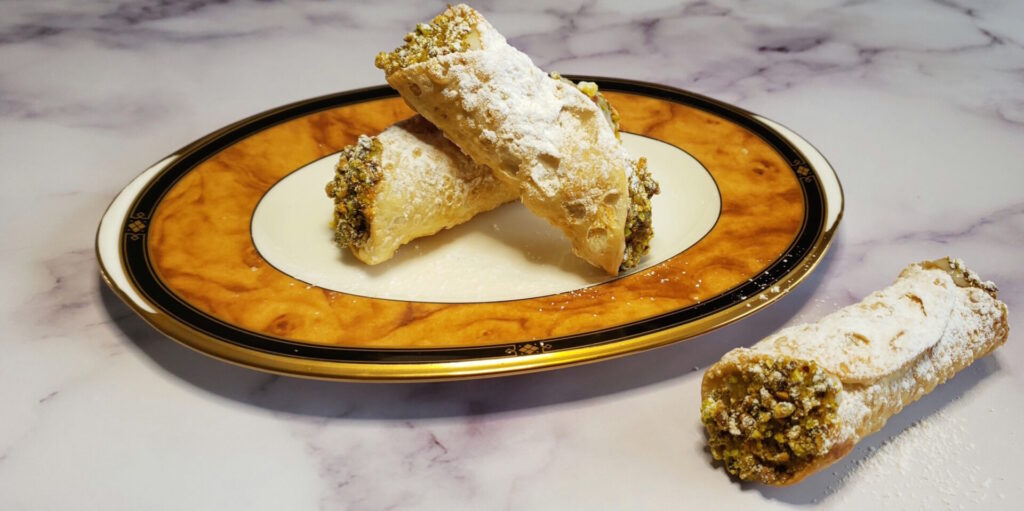
For a truly epic cannoli experience, the filling is piped into cannoli shells (also a family recipe), the ends are dipped in lightly salted, roasted ground pistachios, and the cannoli are dusted with powdered sugar. Crunchy, creamy, bright, earthy, a little sweet with just the right touch of salt. They are divine!
Every year, I make our family’s recipe for both cannoli shells and the custard that fills them for the holidays – family events, office parties, and gatherings with friends – and every year I have someone ask me for the recipe or say that they searched for it on the blog, but couldn’t find it.
Typically, the recipes you find here on the MOstly Bakes blog are my own original recipes. There are a few exceptions – cherished, family recipes from either side of the family that have been re-engineered for today’s home cooks. Like those recipes, this one is not mine from a purely creative perspective. I didn’t develop it, but it is definitely a part of me, my holiday baking traditions, and my identity as a home cook.
This past Christmas, once more I had someone ask for the recipe, and again I explained that it couldn’t be found on the blog because it hadn’t been shared in that space. It was then that I realized that regardless of their origin story, all good recipes are meant to be shared.
Giving credit where credit is due, I’m grateful to the women on my mother’s side of the family who developed this recipe and passed it down through generations. I wish I could have been a quiet observer in their kitchens. I can’t tell their story because I wasn’t there to bear witness, but I can share with you my family’s recipes for custard filling and cannoli shells as they were shared with me.
Jump to RecipeTable of Contents
My Little Chapter in the Story of the Family’s Cannoli Recipe
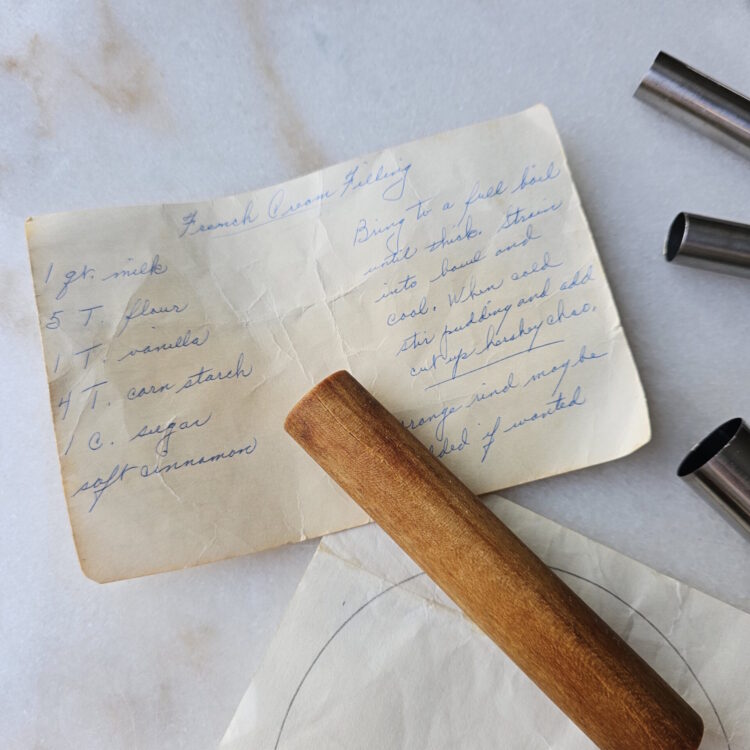
December 2006, my sister and I spent a day deciphering our late Aunt Katie’s copy of the family recipe for cannoli shells and filling. It was nearly a year to the day she had passed away. A year earlier, the cousins had talked about the need to get together, to plan a day when she could teach us how to make some of the old family recipes, including this recipe for cannoli filling. Life got busy and that time with her never happened. We did manage to get everyone together a few years later for a beautiful day of shell-making, food, and laughter.
My mom was one of four sisters born to Italian-American immigrants. Our family had lost another Aunt, Aunt Madge, years earlier, and so, we were feeling that tug, that need to reconnect with something lost, and feed something within us. Cooking and baking is not always about feeding the body. When life’s in balance, I think food ministers equally to body and soul. But there are those times when the soul just needs a nice bowl of comfort food to set things in the world right again.
As we sensed our way through the process, we couldn’t help but feel that Aunt Katie and Aunt Madge were guiding us in spirit. Some things you have to learn by doing. There’s a kinesthetic knowledge that goes deeper than anything you can take away from reading the words written on a page alone. We wanted to learn how to make these delicious pastries we had grown up with. We also wanted to be able to pass down the secrets of that tradition to our own daughters.
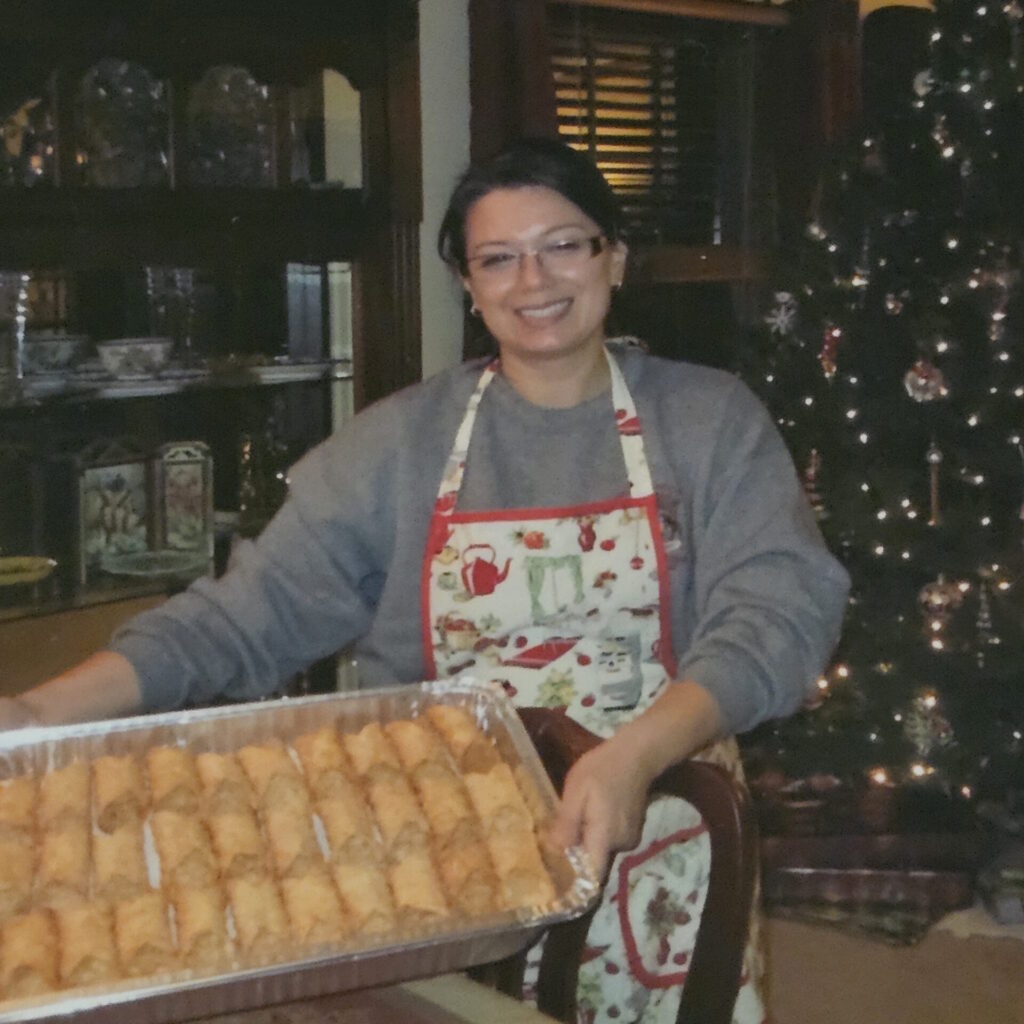
Making homemade cannoli shells that first time took us nearly half a day. At each step, we discussed, second guessed ourselves a time or two, and took notes for the next year. When we tasted the first fruits of our labor, we laughed, cried ugly, happy tears, hugged, gave each other a kiss, and told each other how wonderful we both were. We also thanked the Aunties for helping us along the way.
I’m pleased to report that 2025 marked the 19th year of holiday cannoli shell making.
The History of the Cannoli
Cannoli, the iconic Italian pastry, has a rich history that traces back to Sicily. The exact origin is a topic of debate, but it’s widely believed that the dessert has Arab roots, introduced to Sicily by the Moors in the early 700s AD. The word “cannoli” itself means “little tube” or “little reeds” in Italian, reflecting the dessert’s characteristic tubular shape.
While ricotta is also a traditional filling for cannoli, variations do exist. Some Sicilian recipes, like our family’s, incorporate a custard- or cream-based filling. Custard variations often include ingredients like milk, sugar, cornstarch, flour, and sometimes egg yolks for richness. It provides a creamier and smoother texture compared to the drier ricotta filling.
Cannoli have evolved over time, adapting to regional preferences and ingredients and I love the diverse range of interpretations you see today. The variations in shell ingredients and fillings contribute to the uniqueness and charm of this beloved dessert. However, I think our family’s original cannoli shells recipe is so good that I would confidently plate and share one with any Michelin star pastry chef. Yes, I’m that confident that our family’s cannoli shells and filling recipes are that good.
Authentic Sicilian Cannoli Custard Filling and Variations on a Theme
Although our family’s recipe for making homemade cannoli shells is fairly labor intensive, the filling is quite easy to prepare. With the exception of the orange zest and shaved chocolate, which is added after the custard has cooled, all the other ingredients go into a single, 5-quart pot to cook.
The mixture is gently whisked over medium heat until it thickens to a pudding-like, custard consistency. It is then strained and left to cool. Once completely chilled, the zest and chocolate are added, and the shells can be filled.
The cooling is a crucial step. Do not attempt to add the orange zest or the chocolate before the custard has completely cooled. I cannot stress this enough. The chocolate will melt and leave you with a tasty, but muddy-looking, runny custard that will not pipe properly or stay in the shells.
If you absolutely must speed up the cooling time, strain the custard in a large, glass-bottom baking dish (13 x 9 inches), place a piece of plastic wrap directly on the top of the custard to prevent a skin from forming and pop it in the refrigerator or freezer for approximately 20-30 minutes. Stir the custard at the mid-way point to redistribute the cold and warmer pockets of custard. This will help it chill faster and more evenly. Only after the custard is completely chilled down, can you add the zest and chocolate.
The ends of the filled cannoli are then dipped in lightly-salted, roasted, ground pistachios and dusted with powdered sugar. You are now ready to plate, serve, and finally enjoy!
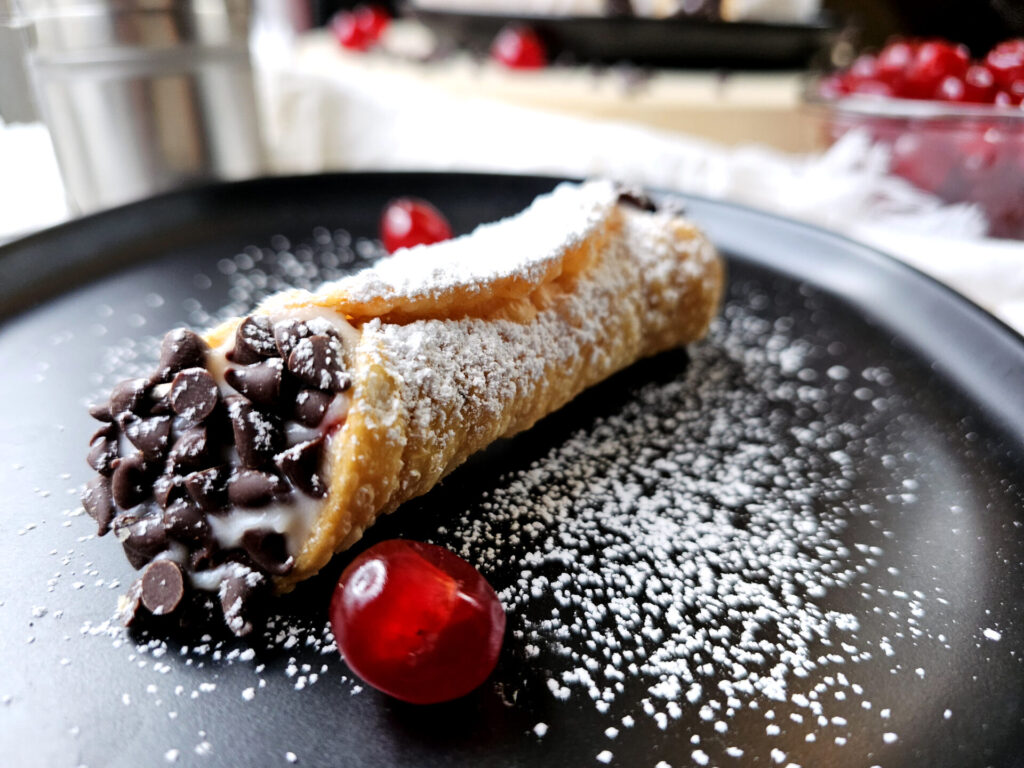
Once you have the shells made, you can fill them with any filling. Although our family’s recipe for this cream filling is my absolute favorite, it you’re looking for a little variety, this recipe for Easy as 1-2-3 Chocolate Cherry Cannoli filling is a pretty and delicious addition to any cannoli tray.
Let’s Get Social!
Thank you for visiting MOstly Bakes! I do hope you have enjoyed reading about the story behind our family’s recipe for cannoli shells and this cream filling recipe. I do hope you give them both a try. The shells, especially, are a little work, but well worth the effort when paired with this custard filling. For more delicious recipes and creative baking ideas, subscribe to our newsletter and follow us on social media via Instagram, Facebook and Pinterest. Thank you again, for visiting and I look forward to connecting with you there!

Authentic Sicilian Cannoli Custard Filling
Course: DessertCuisine: ItalianDifficulty: Easy18
cannolis10
minutes10
minutes1
hourThis recipe yields enough filling for 18 cannoli. See notes at the end of the blog for how to reduce the cooling time.
Ingredients
- For the base custard
1 Quart (4 cups) 2% milk
1 Tbsp. pure vanilla extract (I prefer Mexican vanilla for its flavor)
1 Cup white granulated sugar
3-4 cinnamon sticks
5 Tbsp. A.P. flour
4 Tbsp. corn starch
- For finishing the custard
2 tsp. fresh orange zest
3/4 cup shaved dark chocolate chunks
- For filling, finishing, and serving the finished cannoli
A piping bag or ziplok bag (with a hole cut about the size of a dime) for filling the shells.
1 cup ground, lightly-salted, roasted pistachios
Paper cupcake cups for holding and serving
2-3 Tbsp. powdered sugar for dusting the tops of the finished cannoli
Directions
- Prepare the base custard
- Combine the milk, vanilla, sugar, and cinnamon sticks in a heavy bottom, 5-quart sauce pan.
- Sift the flour and cornstarch directly into the sauce pan and begin gently whisking into the liquid mixture.
- Over medium heat, bring mixture to the boil, stirring constantly to avoid sticking and burning. The mixture is ready when it has thickened to a pudding-like consistency and has reached approximately 180 degrees F. Approx. 8 minutes.
- Remove the finished custard from the heat and pour through a strainer into a glass bowl. Lay a piece of plastic wrap directly on the surface of the custard, not suspended above over the rim of the bowl as this will cause condensation to form and fall down into your custard – yielding a watery custard. The custard can be left to cool at room temperature on the counter or placed in the refrigerator or freezer to reduce the cooling time. Note: Do not skip the cooling step. This is crucial to the success of the finished custard.
- Prepare the finishing ingredients
- While the custard is cooling, prepare your orange zest and chocolate shavings. The chocolate pieces should be small enough to fit through a dime-size opening in a pastry bag. Set aside.
- Grind the pistachios and place them in a small, shallow bowl. Set aside.
- Set aside your paper baking cups, and have a small strainer ready for sifting the powdered sugar over the finished cannoli.
- Finishing and serving the cannoli
- Check to see that the custard has cooled. If the custard is still warm, place it in the refrigerator until it is completely cool to the touch. Once chilled, gently fold in the orange zest and chocolate.
- Transfer the finished custard to a prepared piping bag and fill one end of the cannoli shell until the custard reaches the end. Rotate the shell, and fill the other end of the cannoli shell until the custard reaches the end. You now have a shell full of custard goodness.
- Dip both ends of the shell in ground pistachios and place in a paper cupcake paper. Repeat the process until all the shells have been filled, dipped, and placed in their papers.
- Dust the tops of the finished cannoli with powdered sugar and serve immediately.
- Prepared custard will keep in the refrigerator for up to 2 days. After that, it will still taste good as a pudding, but the texture will start to thin and break down – making it difficult to pipe and hold its shape in the shells.
Notes
- The cooling is a crucial step. Do not attempt to add the orange zest or the chocolate before the custard has completely cooled. I cannot stress this enough. The chocolate will melt and leave you with a tasty, but muddy-looking, runny custard that will not pipe properly or stay in the shells. If you absolutely must speed up the cooling time, strain the custard into a large, glass-bottom baking dish (13 x 9 inches), place a piece of plastic wrap directly on the top of the custard to prevent a skin from forming and pop it in the refrigerator or freezer for approximately 20-30 minutes. Stir the custard at the mid-way point to redistribute the cold and warmer pockets of custard. This will help it chill faster and more evenly. Only after the custard is completely chilled down, can you add the zest and chocolate.